
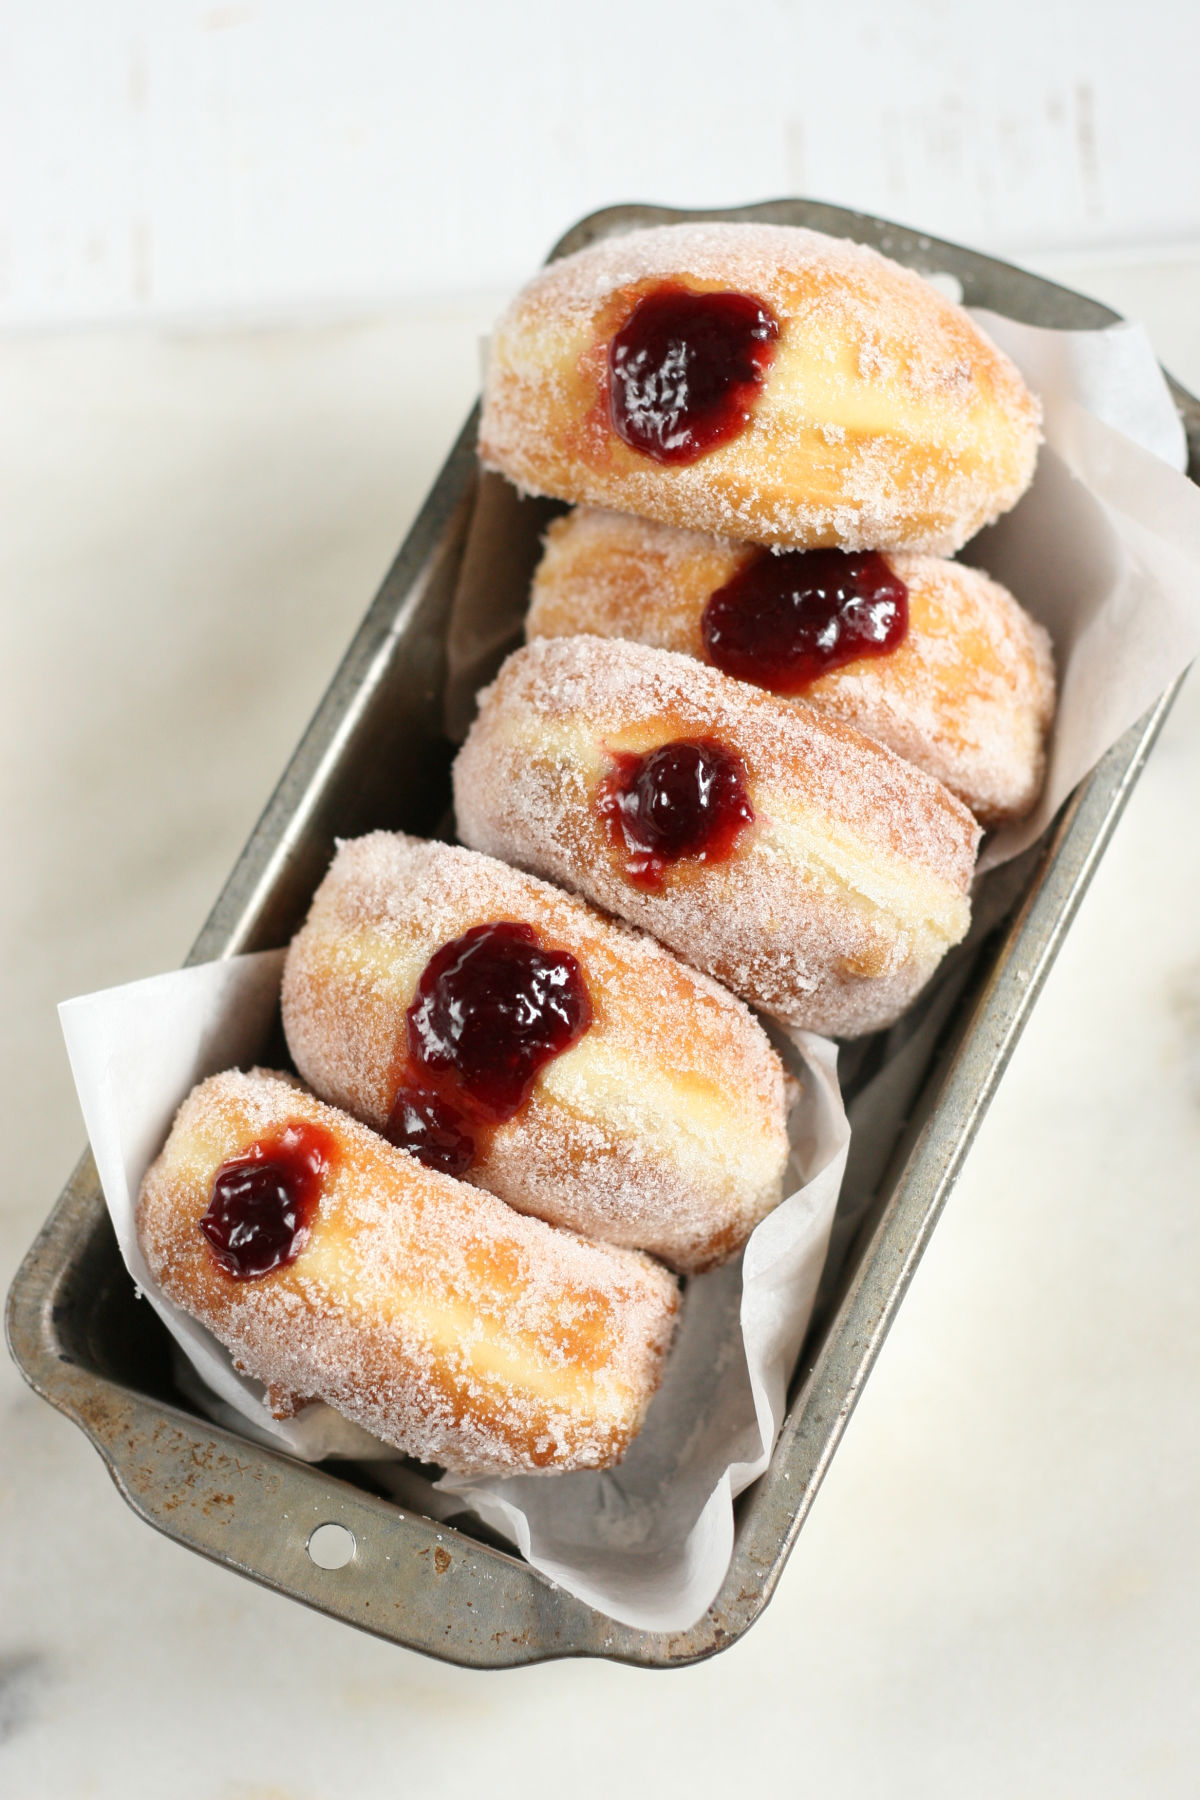
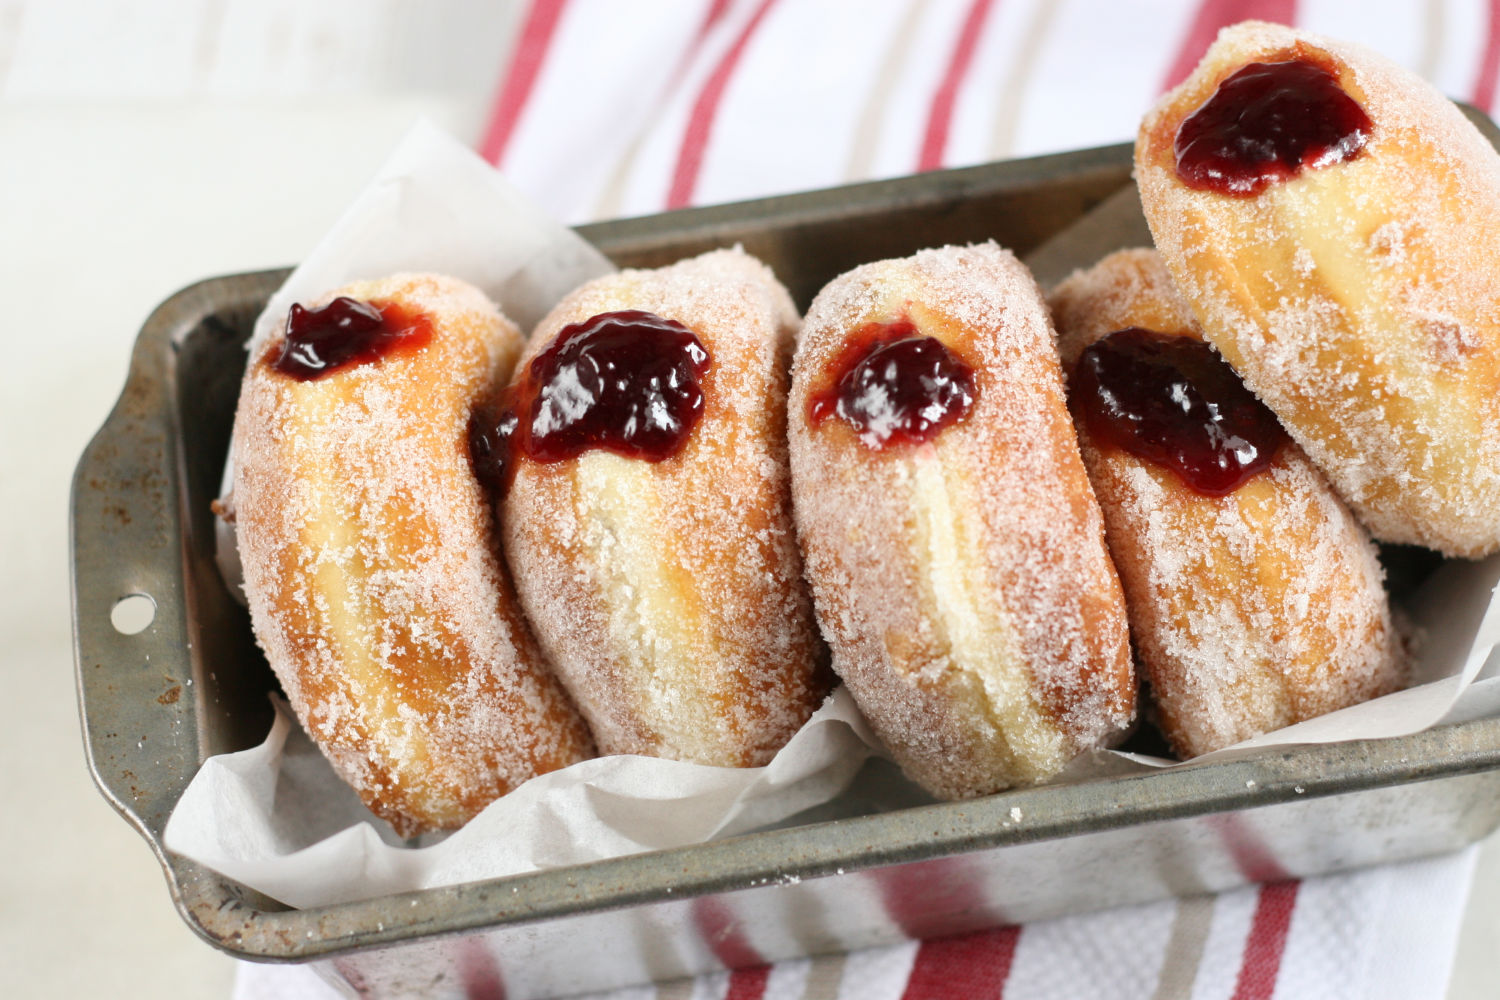
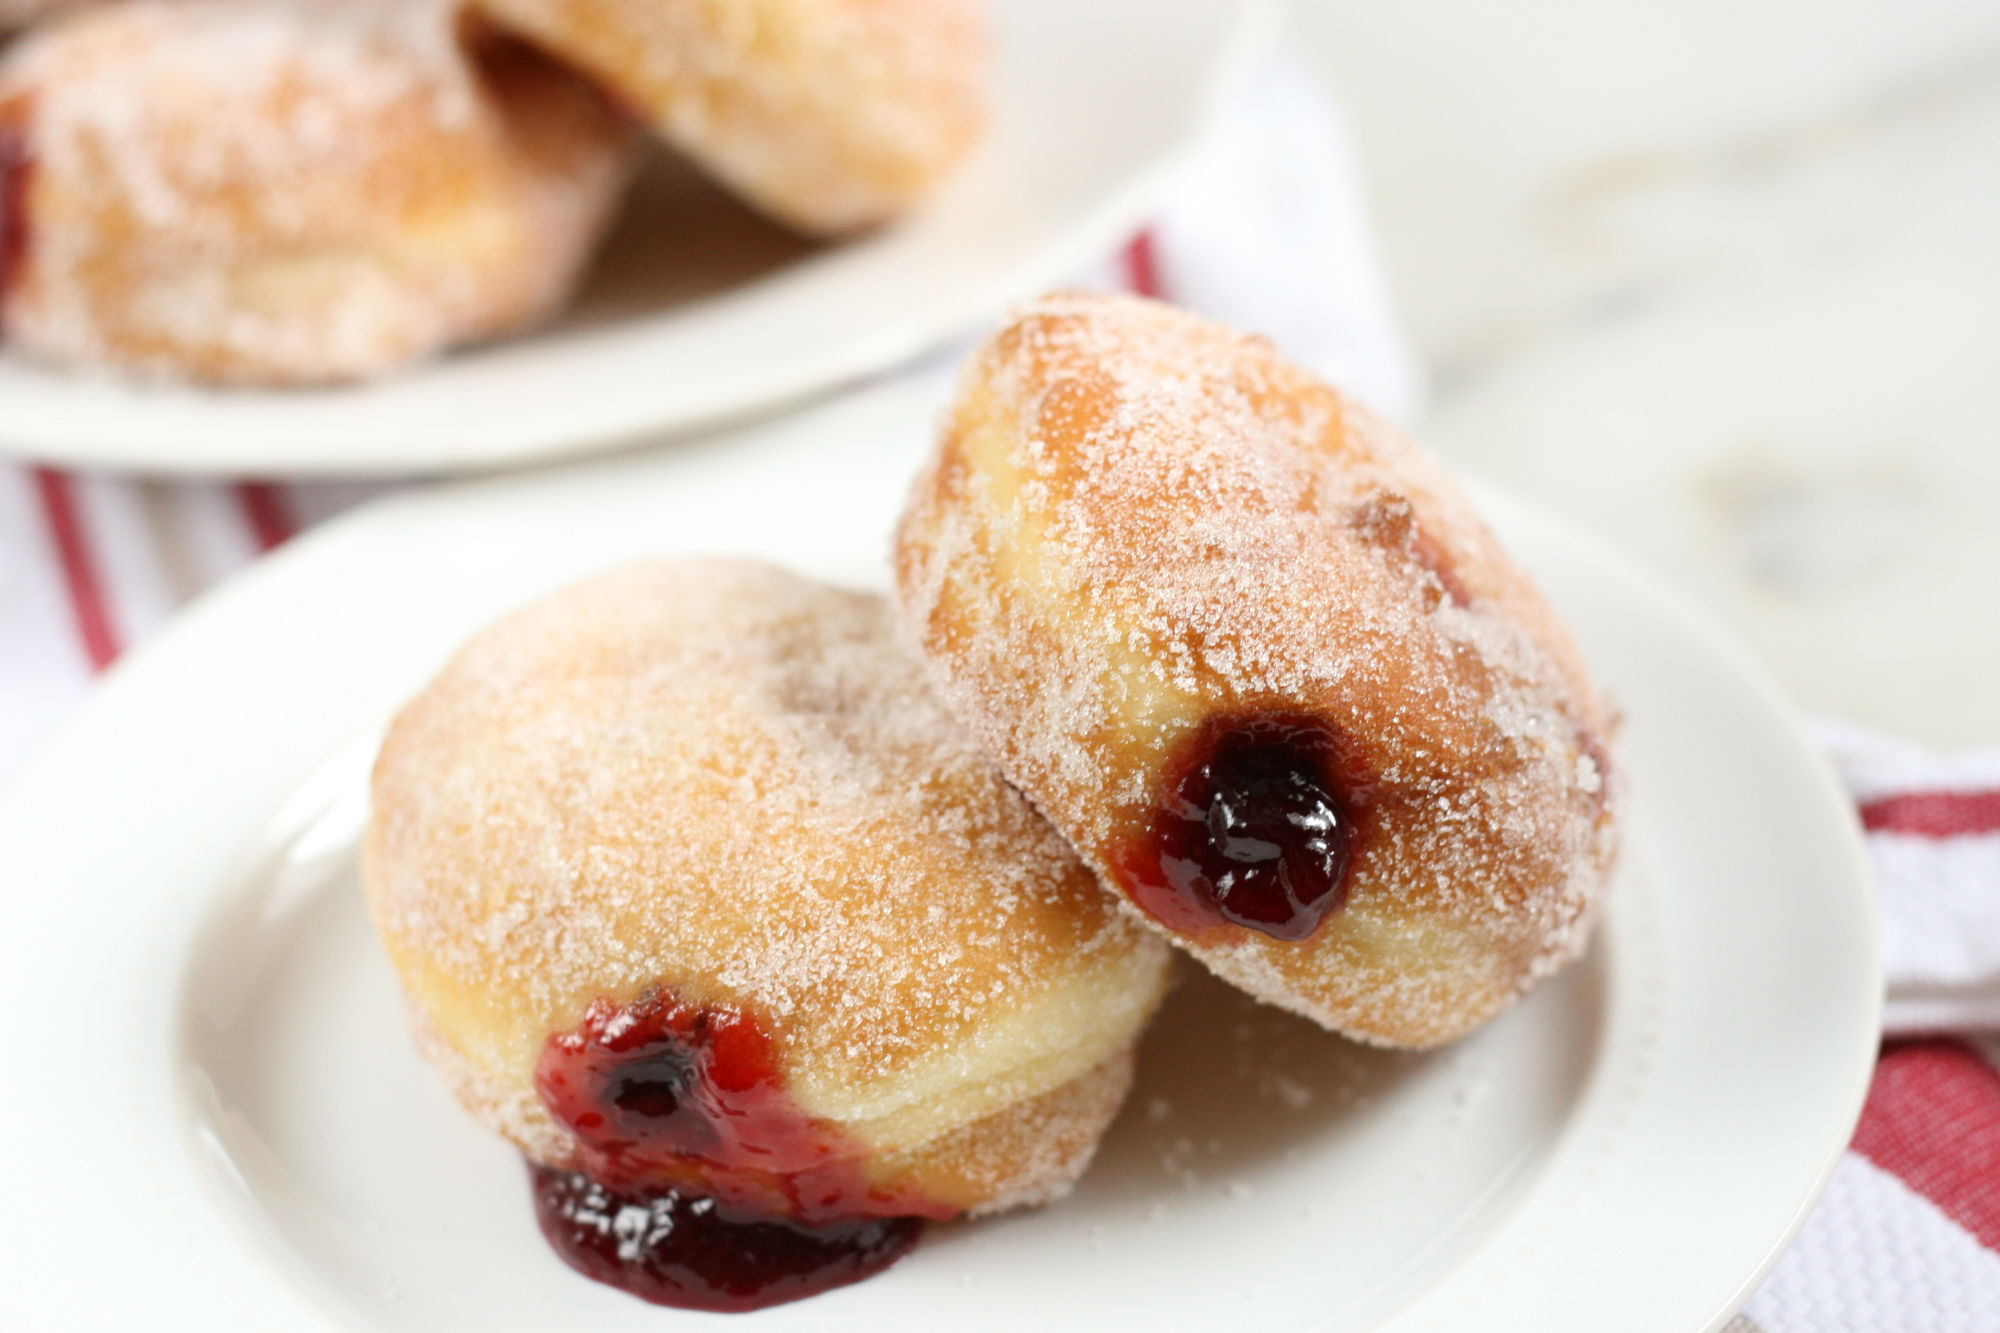
Homemade Jelly Donuts filled with raspberry jam is one of my favorite donuts recipe. Light and fluffy homemade donuts coated in granulated sugar and filled with raspberry jam.
Jelly donuts are easy to make with pantry ingredients. Pillow soft, fluffy donuts filled with homemade or store-bought raspberry jam. They can be made ahead of time and refrigerated overnight. So much better than donuts from the donut shop.
One of my fondest memories growing up on a small farm, was my mom making homemade doughnuts. She would stand in our small kitchen frying doughnuts, while an auburn color Golden Retriever impatiently waited at her feet for donut holes to drop.
She mostly made an old-fashioned cake-style donut. They barely had time to cool before we were popping them into our mouths! Inspired by my mom, I’m sharing my recipe for Homemade Jelly Donuts.
Making donuts from scratch isn’t hard, it just takes a some of time for the dough to rise.
To help save time, often times, I’ll make donuts in the afternoon/evening and let them have their final proof in the fridge overnight. Try my Glazed Donuts and Apple Fritters.
How to make jelly donuts
Step 1: In a large mixing bowl of a stand mixer dissolve the yeast in the warm water. Add the warm milk, sugar and eggs.
Use the dough hook attachment, and stir in the flour and salt. Scrape the bottom and sides of the bowl occasionally with a rubber spatula.
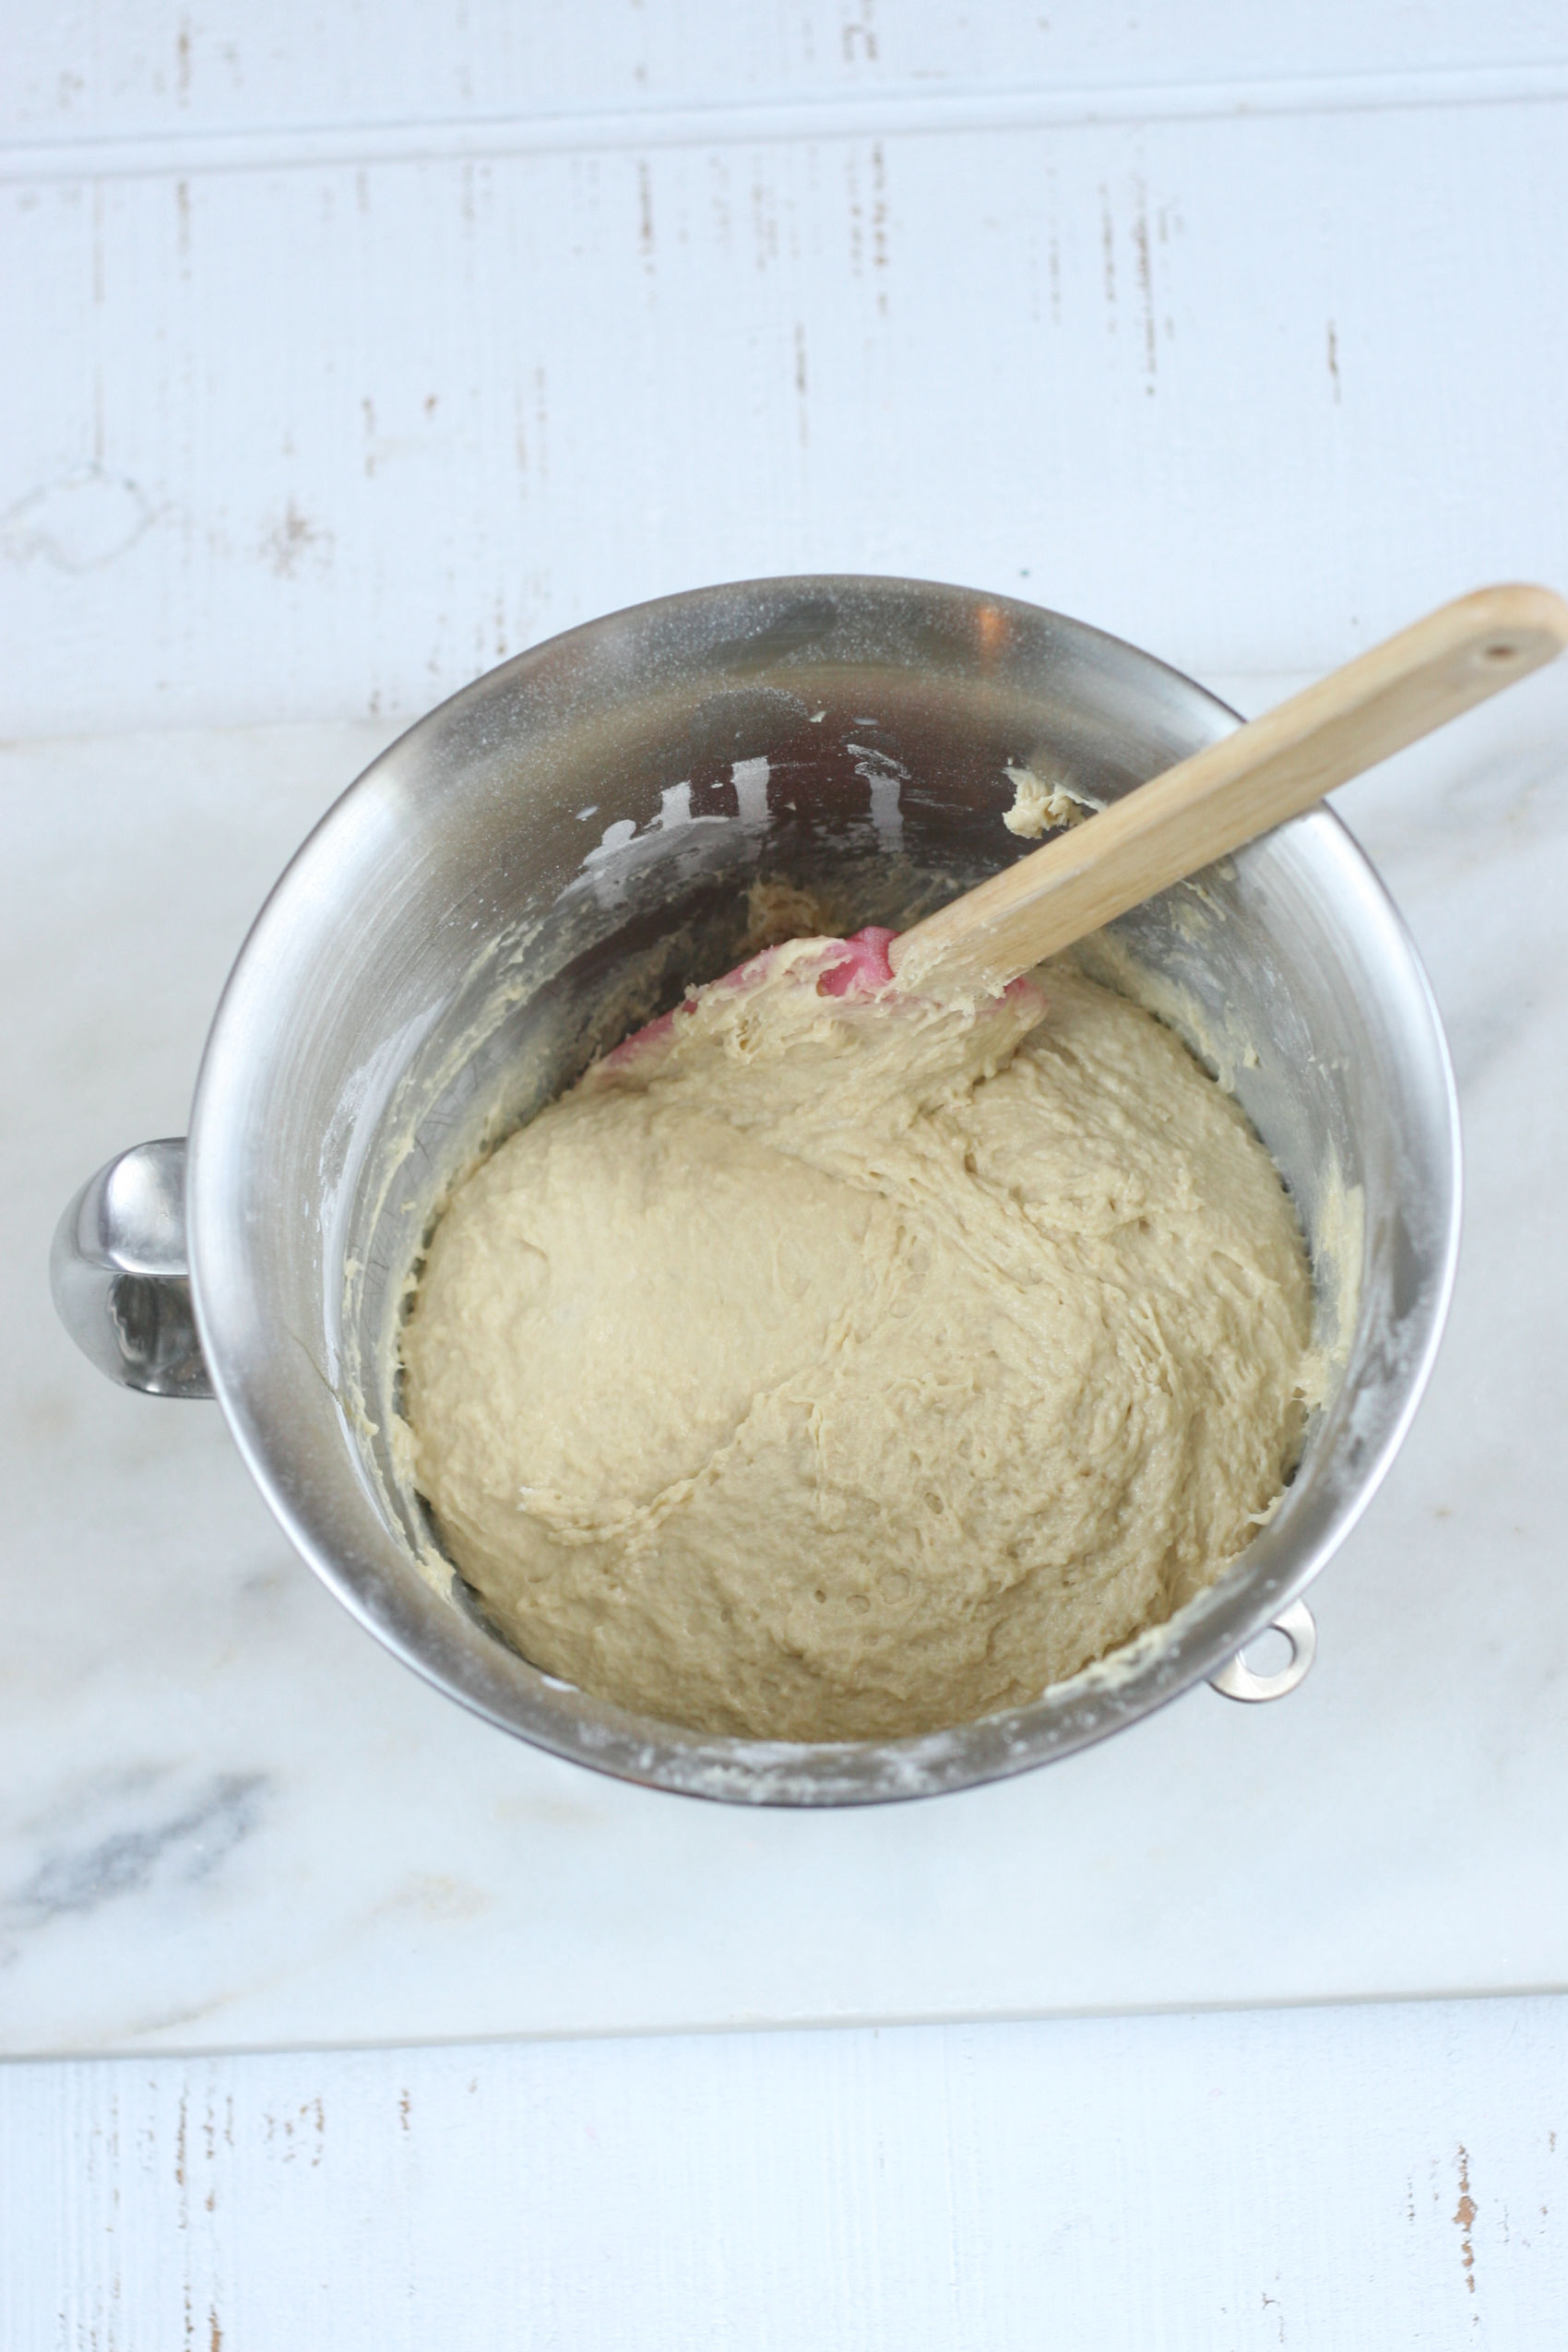
Step 2: Cut the butter into small pieces and incorporate into the dough. Scrape the bowl a few times. Beat the dough until it becomes smooth, about 5-7 minutes.
Step 3: Turn the dough out onto a floured work surface and knead for 5-6 minutes, making a smooth dough. This dough is going to be sticky when you turn it out.
After kneading, shape into a round ball and place back into the greased mixing bowl. Cover loosely with plastic wrap and drape with a clean kitchen towel. Place in a warm area and let rise until doubled in size, about 1-2 hours.
Step 4: Turn the dough out onto a lightly floured work surface and knead the dough for a few minutes. Turn back into the greased bowl (spray with cooking spray again if needed) and let rise until doubled, about 1 hour.
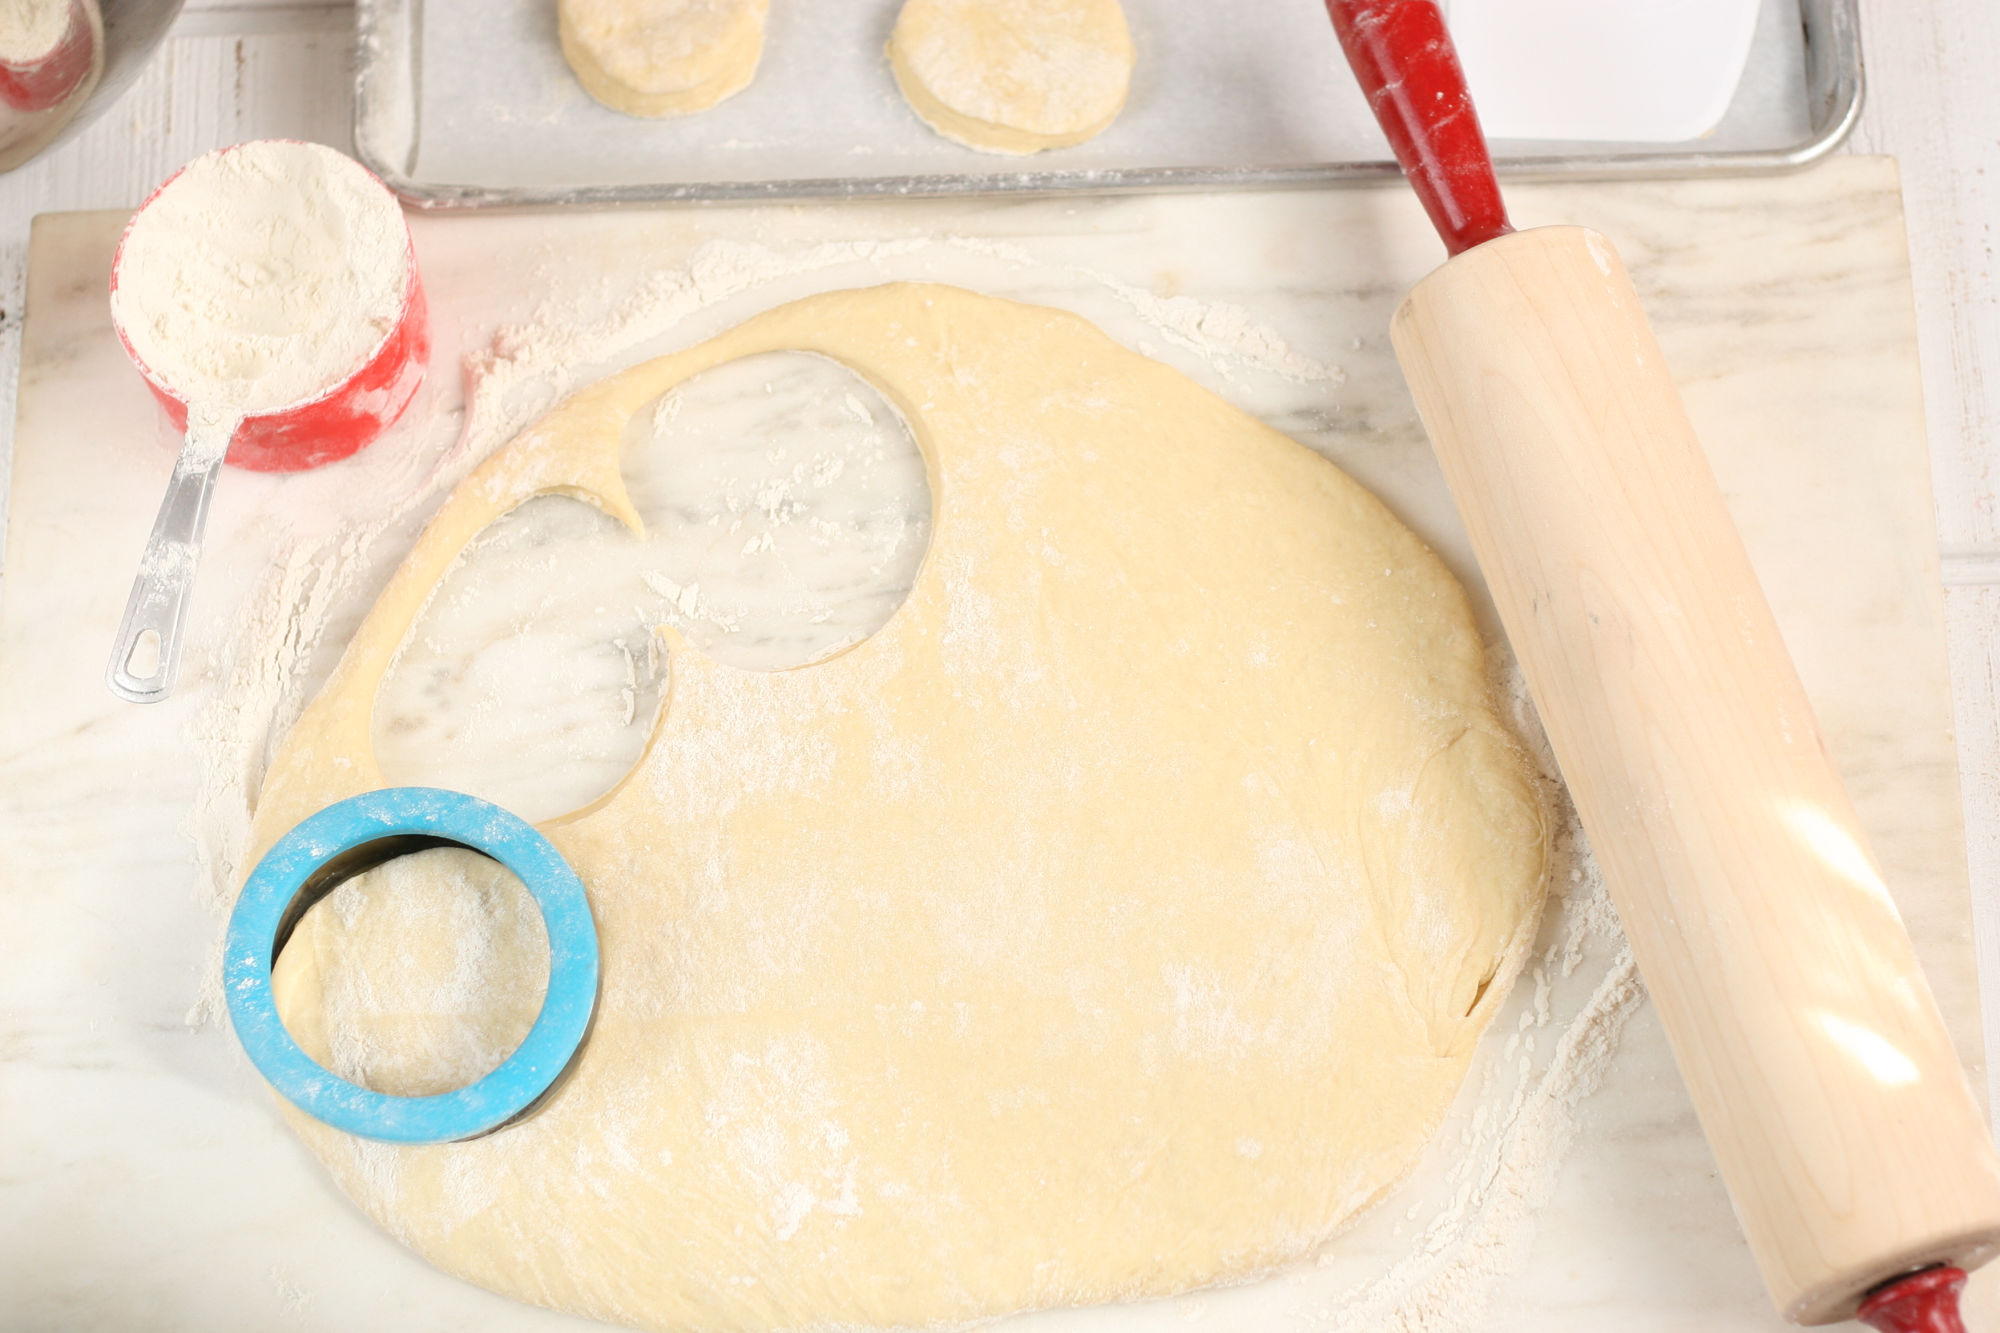
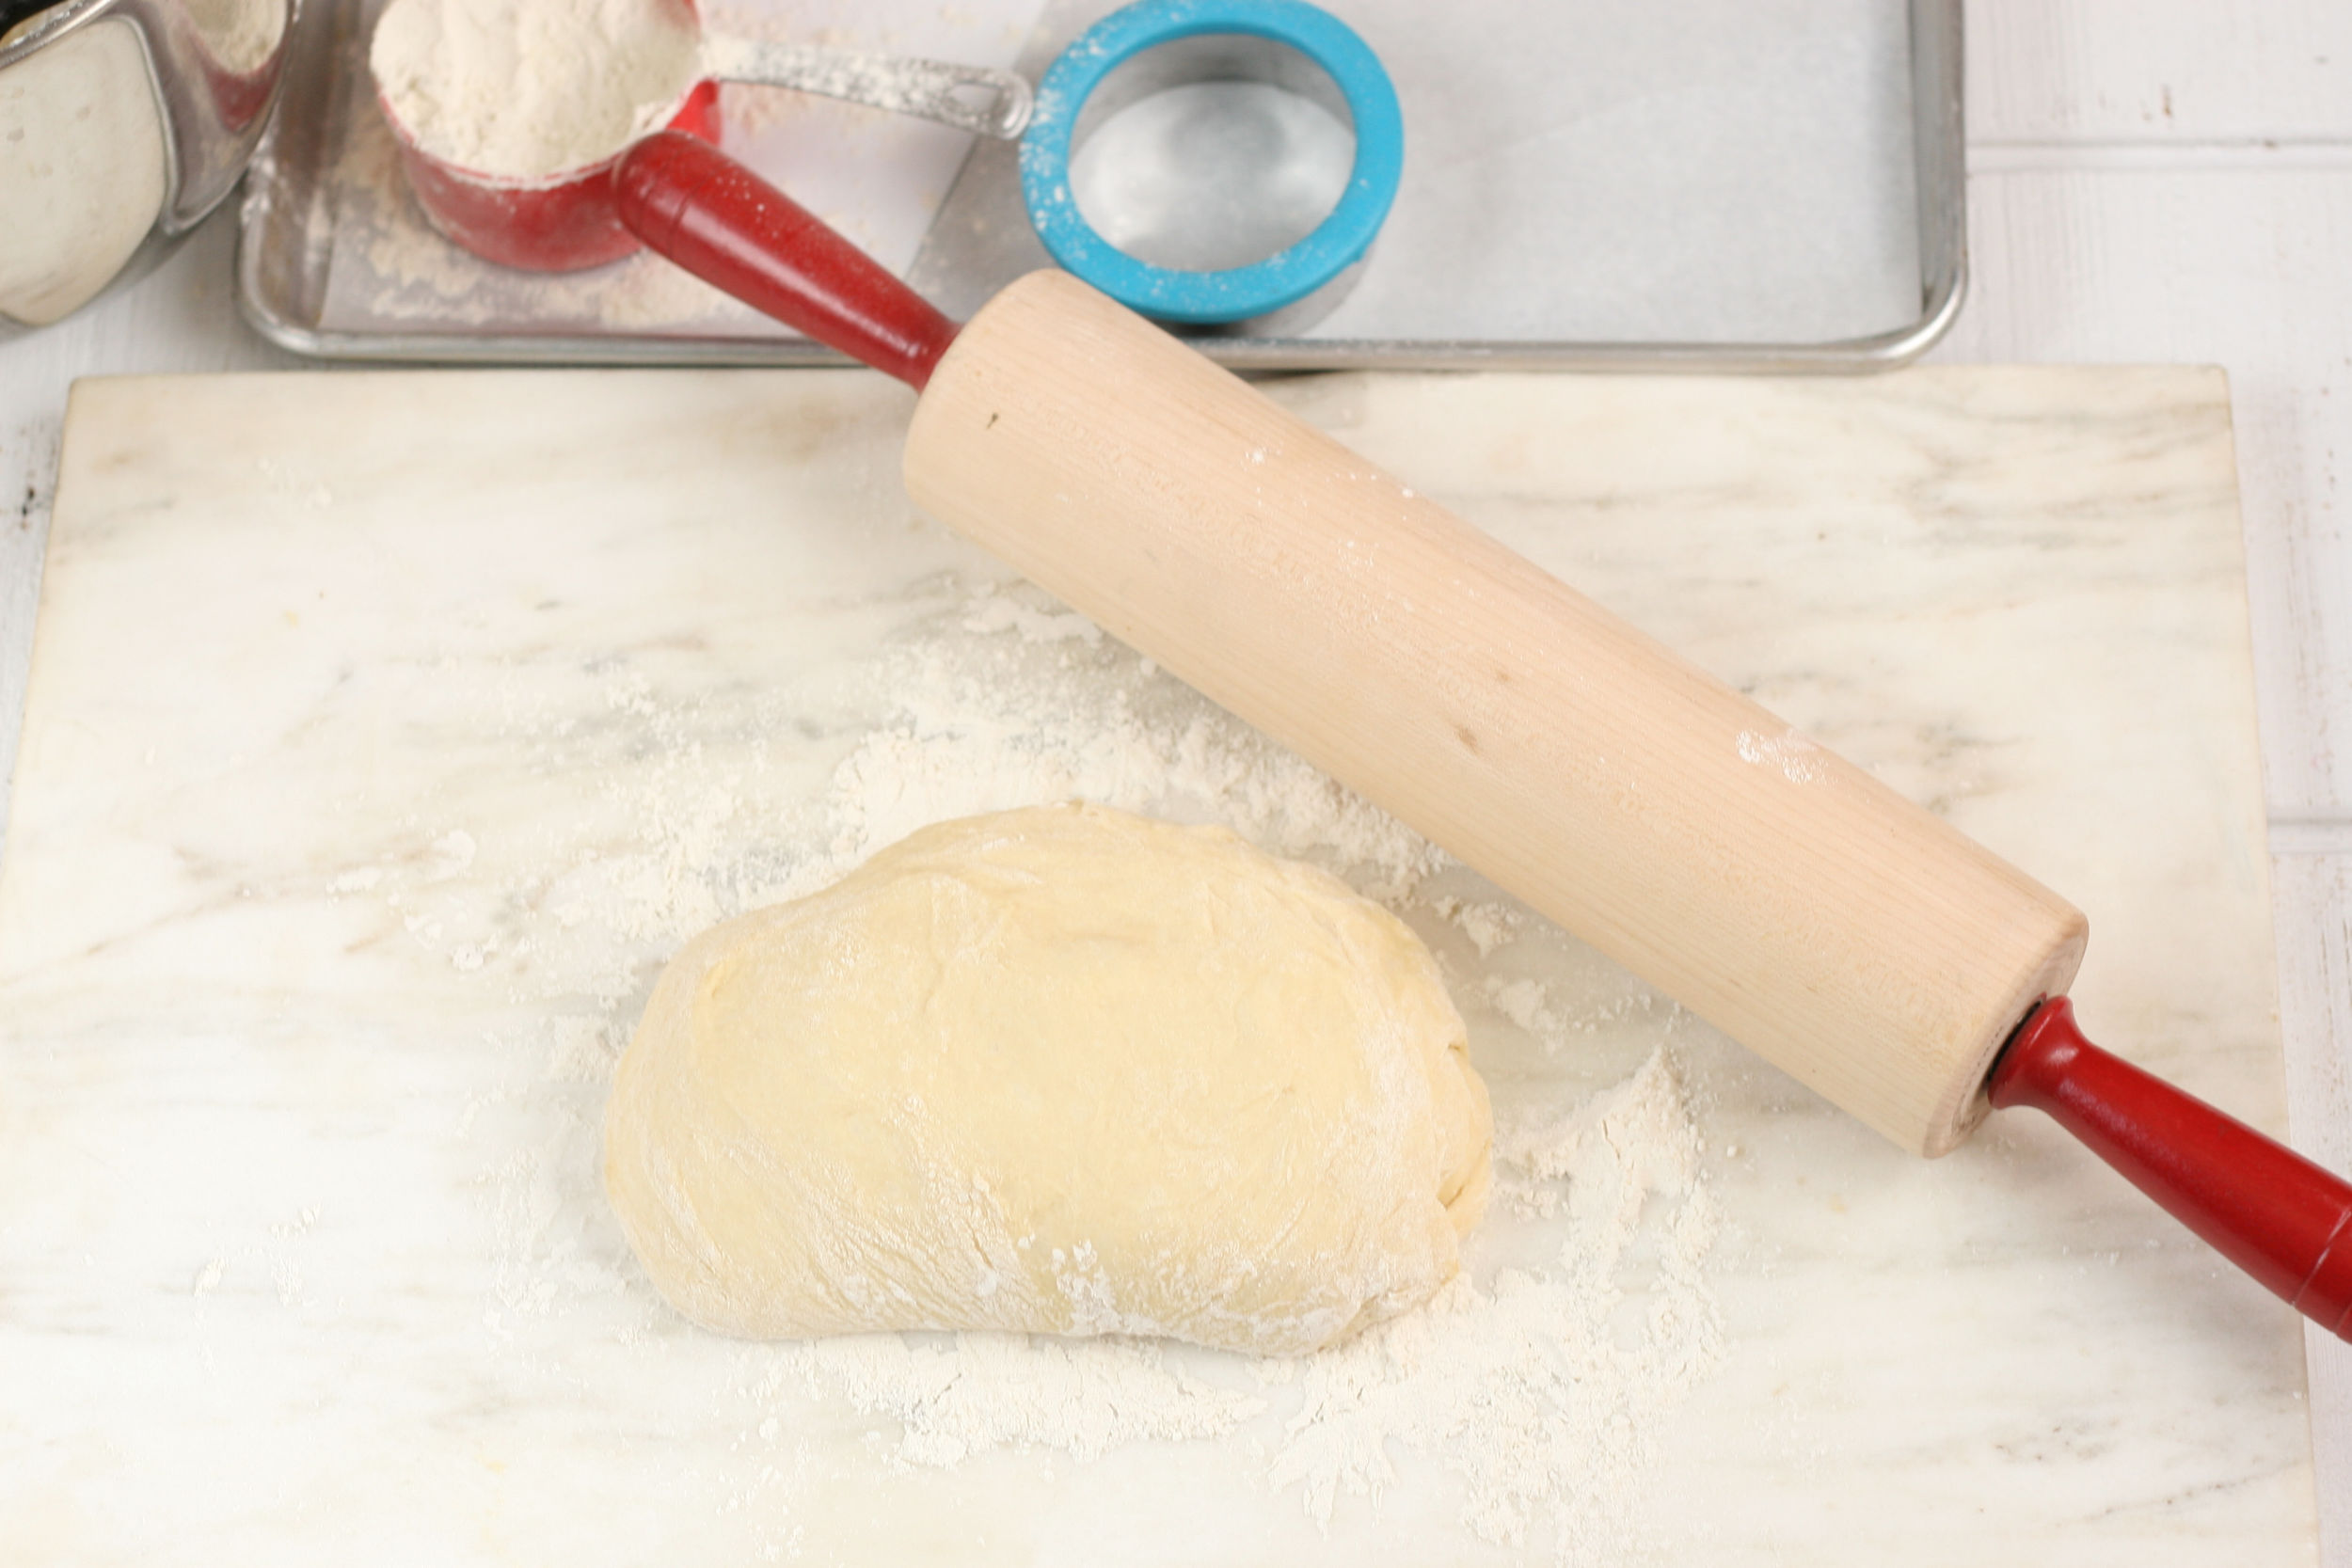
Step 5: Roll out the dough to about ¾-inch thickness on a lightly floured surface. Then cut out doughnuts with a 3 ½-inch round doughnut cutter.
Rub the doughnut cutter in plenty of flour for each cut you make. Twist the doughnut cutter back and forth a bit and gently bang out the doughnut onto the counter.
Step 6: Place the doughnuts evenly onto a half sheet pan lined with parchment paper. You’ll want to give them a little room to rise on the sheet pan. (I generally put 3 doughnuts in each row and you’ll fit about a dozen on each half sheet pan)
Step 7: Cover loosely with plastic wrap and plop in the refrigerator overnight. This way, they’ll proof in the fridge and you’ll have most of the work done in the morning. Just get to frying them up fresh.
Step 8: Take the donuts out of the fridge and let them warm up while your oil heats up. Place about 3-4 inches deep of canola oil in a 12-inch or 13.5-inch cast iron skillet.
Heat up the oil over medium heat to 375 degree F canola oil. Use a digital thermometer to maintain 375 degrees at all times while frying doughnuts.
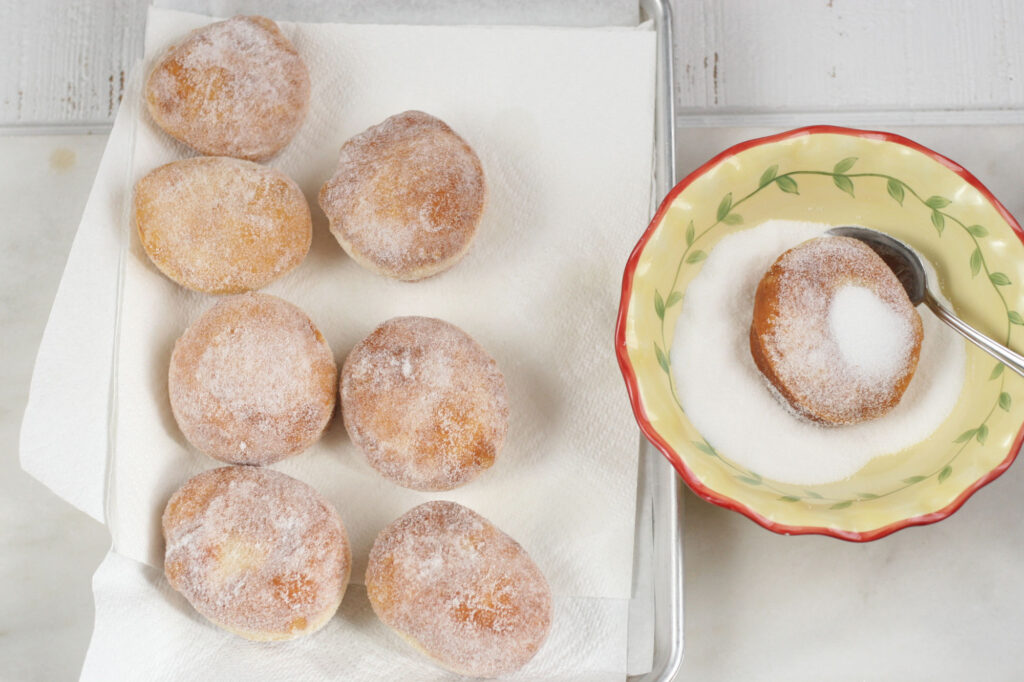
Cook a few doughnuts at a time for about 1-2 minutes per side. Once fried, place them on a sheet pan lined with plenty of paper towels to absorb some of the excess oil.
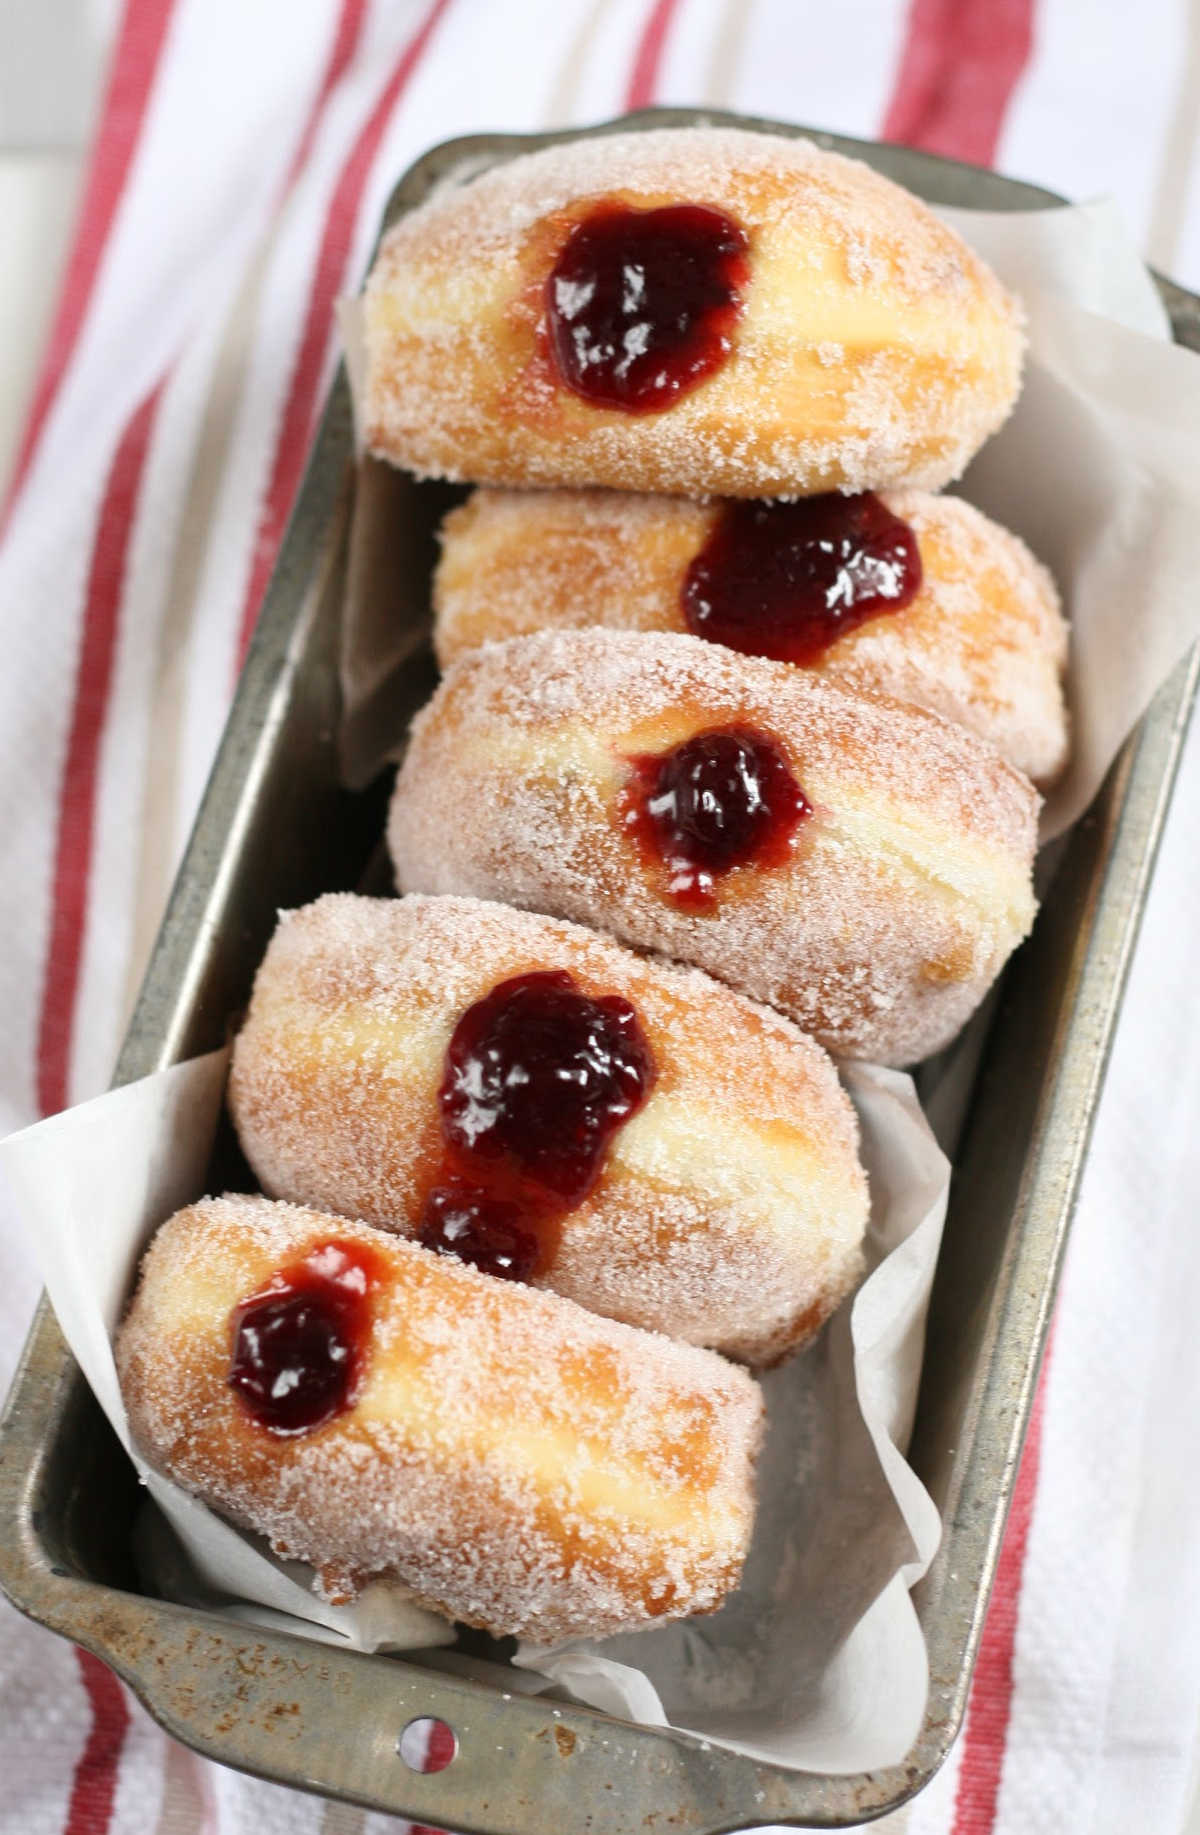
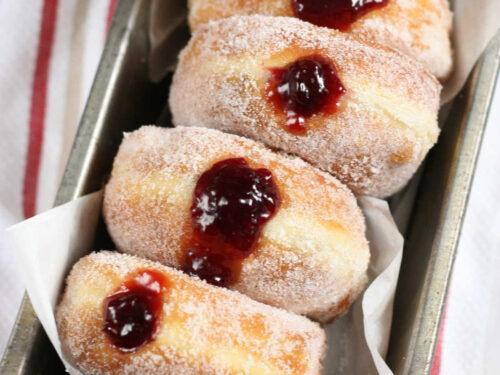
While they are still warm, gently toss in granulated sugar.
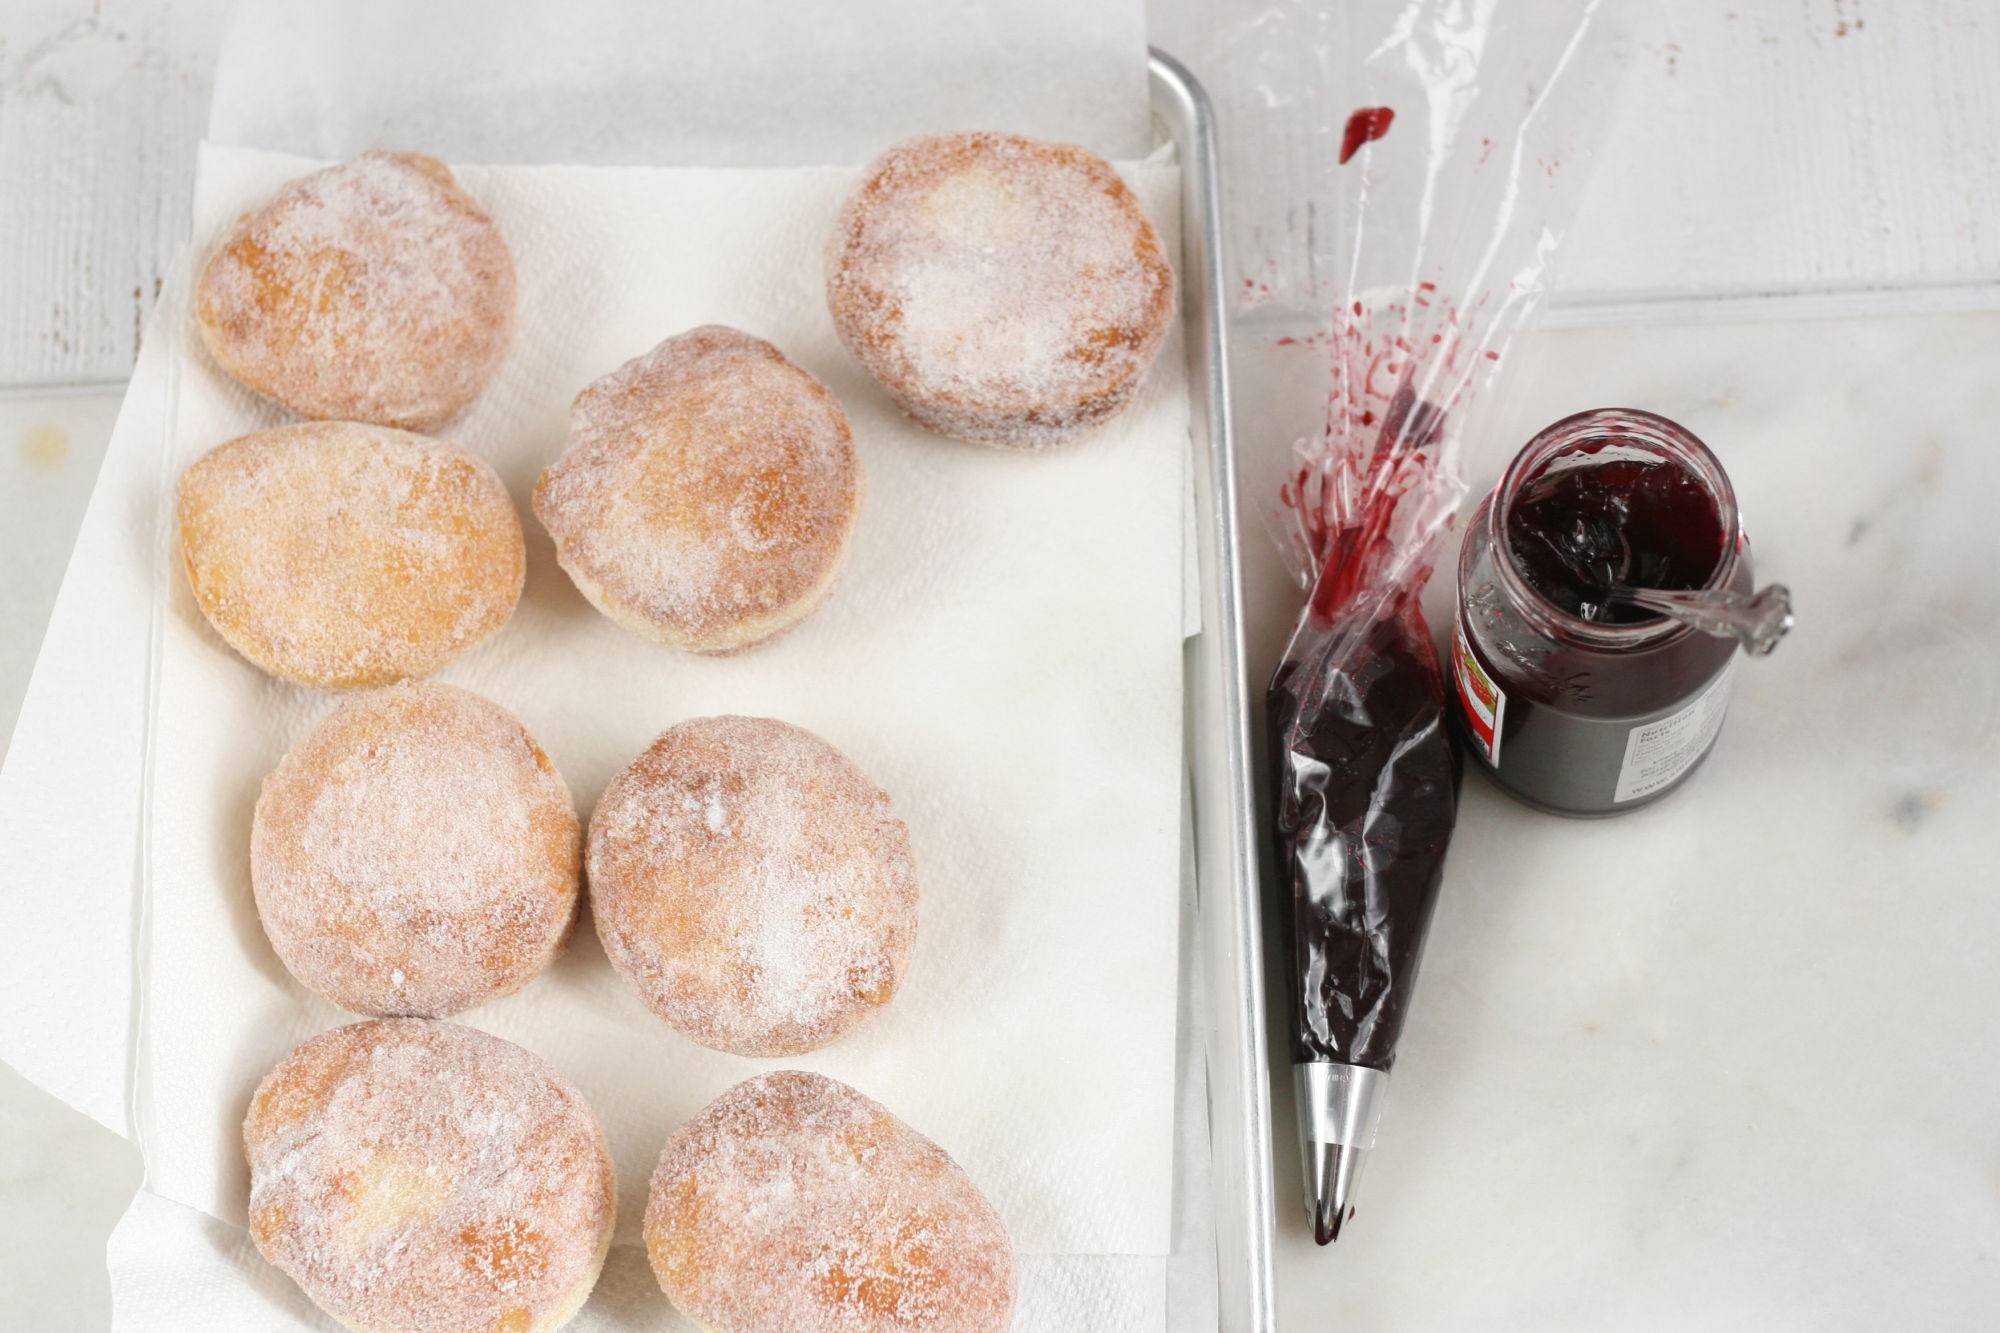
Fill Jelly Donuts with store-bought Raspberry or Strawberry Jam
Place preserves or jelly into a disposable pastry bag with a pastry tip and insert the tip into the side of a doughnut. Squeeze preserves or jelly into each donut to fill. Enjoy immediately or within a day or so.
You can also roll them in powdered sugar. But, but sure and wait until the donuts are completely cooled before rolling in powdered sugar. I hope you enjoy these jelly donuts as much as we do!
And for more great doughnut recipes, try Apple Cider Donuts, Blueberry Cake Donuts, Homemade Pumpkin Donuts, and Red Velvet Donuts.
Did you make one of my recipes? Please take a moment to leave a star rating. Also, if you are on Pinterest, please feel free to leave a comment there! Follow A Farmgirl’s Kitchen on FACEBOOK, PINTEREST and YouTube and subscribe my mailing list for ALL the latest recipes!
Jelly Donuts
Equipment
Ingredients
Jelly Doughnuts
- 2 ¼ teaspoons (1 packet) active dry yeast
- ¼ cup lukewarm water
- 1 ½ cups whole milk (scalded and cooled to warm)
- ½ cup granulated sugar
- 3 large eggs room temperature
- 5 ½ to 6 cups all-purpose flour
- 1 teaspoon salt
- ½ cup (1 stick) unsalted butter softened
- canola oil for frying (substitute lard or vegetable shortening)
- sugar to coat doughnuts
- 1 (18-ounce) jar Raspberry preserves or jelly (seedless jam or preserves)
Instructions
Jelly Doughnuts
- In a large mixing bowl of a stand mixer dissolve the yeast in the warm water. Add the warm milk, sugar, and eggs. Add the dough hook attachment, and stir in the flour and salt. Scrape the bottom and sides of the bowl occasionally with a rubber spatula. Cut the butter into small pieces and incorporate into the dough. Scrape the bowl a few times. Beat the dough until it becomes smooth, about 5-7 minutes.
- Turn the dough out onto a floured work surface and knead for 5-6 minutes, making a smooth dough. This dough is going to be sticky when you turn it out. After kneading, shape into a round ball and place back into the greased mixing bowl. Cover loosely with plastic wrap and drape with a clean kitchen towel. Place in a warm area and let rise until doubled in size, about 1 to 1 ½ hours.
- Turn the dough out onto a lightly floured work surface and knead the dough for a few minutes. Turn back into the greased bowl (spray with cooking spray again if needed) and let rise until doubled, about 1 hour.
- Roll out the dough to about ¾-inch thickness on a lightly floured surface. Then cut out doughnuts with a 3 ½-inch round doughnut cutter. Rub the doughnut cutter in plenty of flour for each cut you make. Twist the doughnut cutter back and forth a bit and gently bang out the doughnut onto the counter.
- Place the doughnuts evenly onto a half sheet pan lined with parchment paper. You’ll want to give them a little room to rise on the sheet pan. (I generally put 3 doughnuts in each row and you’ll fit about a dozen on each half sheet pan) Cover loosely with plastic wrap and plop in the refrigerator overnight. This way, they’ll proof in the fridge and you’ll have most of the work done in the morning. Just get to frying them up fresh.
- OR To make doughnuts immediately, let the doughnuts rise on the counter for about 30 minutes. (Cover the tray loosely with plastic wrap or with a clean kitchen cloth)
- Place about 3-4 inches deep of canola oil in a 12-inch or 13.5-inch cast iron skillet. Heat up the oil over medium heat to 375 degree F canola oil. Use a digital thermometer to maintain 375 degrees at all times while frying doughnuts.
- Cook a few doughnuts at a time for about 1-2 minutes per side. Flip carefully. Once fried, place them on a sheet pan lined with plenty of paper towels to absorb some of the excess oil. While they are still warm, gently toss in granulated sugar.
- Place preserves or jelly into a pastry bag with a pastry tip and insert the tip into the side of a doughnut. Squeeze in preserves or jelly to fill. Enjoy immediately with a fresh cup of coffee, if desired.
Nutrition
Disclosure: As an Affiliate Marketer, I earn from qualifying purchases. If you click a product affiliate link on A Farmgirl’s Kitchen and make a purchase, I may receive a commission at no additional cost to you! I own every cooking product I recommend and love how they perform.
Lisa Hatfield says
A great jelly donut recipe, it works every single time! Jessica, thanks for sharing your family recipes.
Seanna Borrows says
Jessica, your recipes always hit the spot. These jelly donuts are amazing! And your instructions are so easy to follow. Love that you can make these day before and fry in the morning. Bet they’d be super tasty with your raspberry rhubarb jam recipe.
Melinda says
Hey Jessica.
I haven’t tried your donut recipe yet, but would very much like to!
I’m wondering if I would be able to oven baked them, instead of frying them in oil? I know it’s a very weird request for a donut recipe. Having a get together with my grandmother and she isn’t allowed deep fried/oil coated foods.
Thank you 🙂 look forward to hearing from you!
Jessica Robinson says
Hello Melinda,
This is a traditional yeast style donut that is meant to be fried. If you have your oil hot enough, the dough will not absorb too much oil. We do have several other cake type donut recipes on our website that you could try and bake. But, we fry all of our donuts. Remember, everything in moderation.
Lauren says
If I made these on Monday night would they still be fresh enough to eat Wednesday morning ?
Jessica Robinson says
Donuts are best when served fresh. I would suggest you make them at night and refrigerate overnight (uncooked) on a half sheet pan lined with parchment paper, cover the entire pan loosely with plastic wrap. Then fry up fresh the next morning.
Lori says
I’m thinking of making these, but wonder does the butter need to be cold or room temperature?
Thank you
Jessica Robinson says
Lori,
Thanks so much for stopping by! The recipe notes “softened” butter. Which usually means room temperature or you can microwave butter for a few seconds until it is properly softened.
Cynthia Wandel says
I made the dough for these tonight. I don’t have canola oil, can I use vegetable oil instead?
Thanks,
Cindy
Jessica Robinson says
Hi Cynthia,
You can of course use vegetable oil. We prefer canola oil because it does not give any “off” flavor to things you fry such as donuts, apple fritters or fried apple hand pies.
Kandi says
Made with my grand daughter and they turned out perfect
Jessica Robinson says
Thanks Kandi!! So glad to hear you enjoyed them!
Lily says
Hi Love,
Can you share this recipe in grams? Id like to make jus the half of it and it’s difficult. Thank you 🙂
Jessica Robinson says
Lily,
Grams is not a measurement we use.
Rachael says
Can you do all the kneading in the mixer, instead of the 2nd 1/2 of kneading by hand?
Jessica Robinson says
Rachael,
I would NOT recommend kneading in the mixer. You need to just gently knead on a floured work surface, by hand. Otherwise you will overwork the dough!
Jo-Anne says
This was first attempt at making homemade donuts. My husband and I made them together. I didn’t have a donut cutter so I used a large lid. I was able to make 24 donuts. We will be freezing some. 12 were coated with powdered sugar and filled with raspberry jam and 12 were coated with sugar and cinnamon and filled with lemon pudding. My husband has tried them and is very pleased. We will make these over and over again.
Jessica Robinson says
Jo-Anne!
So happy to hear you had success with this recipe (even without a doughnut cutter!)
Thanks for sharing! Be sure and check out my other doughnut recipes- especially the apple cider doughnuts in the fall!
June says
Can I make the dough in my bread machine instead of bowel with dough hook
Jessica Robinson says
Hello June,
To be honest, I have never used a bread machine. Do you have a stand mixer? Because if you don’t have a dough hook, you could certainly use the normal paddle. You just want to be SUPER careful NOT to overwork the dough in something like a bread machine! I would say knead by hand, rather than a machine.
Jyothi Kesha says
Can you refrigerate the dough and fry over several days? Or is it better to fry them all at once?
Jessica Robinson says
Hi Kesha!
They are best if you fry them ALL up the next day. However, you can cut your recipe in half. I usually make them all- have some for our household and share with a few friends or neighbors.
Jyothi Kesha says
Thank you so much for your speedy reply, and btw, they were FABULOUS. Thank you for this wonderful, wonderful forever-recipe!
Jessica Robinson says
Not a problem!! Happy to hear that you loved them! If you found the recipe via Pinterest… would you please take a pic and share on the pin? Would love to see how they came out! Thanks again!
Michaela says
Can you just let them rise on the counter after cutting them out and fry same day? If so, how long for the third rise?
Jessica Robinson says
Of course! Just let them rise on the counter. Cover the doughnuts with a clean dish cloth or plastic wrap! They just need to rise – probably about 30 minutes.
Janet Levy says
I made 1/3 of the recipe this morning – 7 doughnuts. They were outstanding using Bon Mamon Raspberry Preserves!
I froze the few that we didn’t eat, although I’m not a big fan of defrosted doughnuts. Tomorrow, I’m going to put them in a 350 F. oven covered with foil for 10-15 minutes to see if they can be brought back to life.
Jessica Robinson says
So glad to hear that you loved the doughnuts!!!
Janet Levy says
Jessica – Can you supply the weights of each ingredient?
Jessica Robinson says
Janet,
I would recommend you search online for conversions of cups to weight baking of ingredients. Thanks!
Lisa Hatfield says
These donuts look so AMAZING and professional!!! Wow, I know this will become a family favorite recipe.