• Skip to main content
  • Skip to primary sidebar

A Farmgirl's Kitchen® logo

  • Facebook
  • Instagram
  • Pinterest
  • Twitter
  • Home
  • About
    • Privacy Policy
  • Farm Fresh
  • Recipes
  • Contact
  • Shop
menu icon
go to homepage
search icon
Homepage link
  • Home
  • About
    • Privacy Policy
  • Farm Fresh
  • Recipes
  • Contact
  • Shop
    • Facebook
    • Instagram
    • Pinterest
  • ×

    Home » Recipes » Breads and Doughnuts » Classic Glazed Donuts

    Published: Jan 18, 2019 · Modified: Feb 20, 2022 by Jessica Robinson · This post may contain affiliate links

    Classic Glazed Donuts

    52.9K shares
    • Facebook
    • Email
    Jump to Recipe
    glazed donuts drying on baking rack
    glazed donuts drying on a baking rack
    glazed doughnuts drying on a baking rack, glaze dripping onto white parchment paper below rack

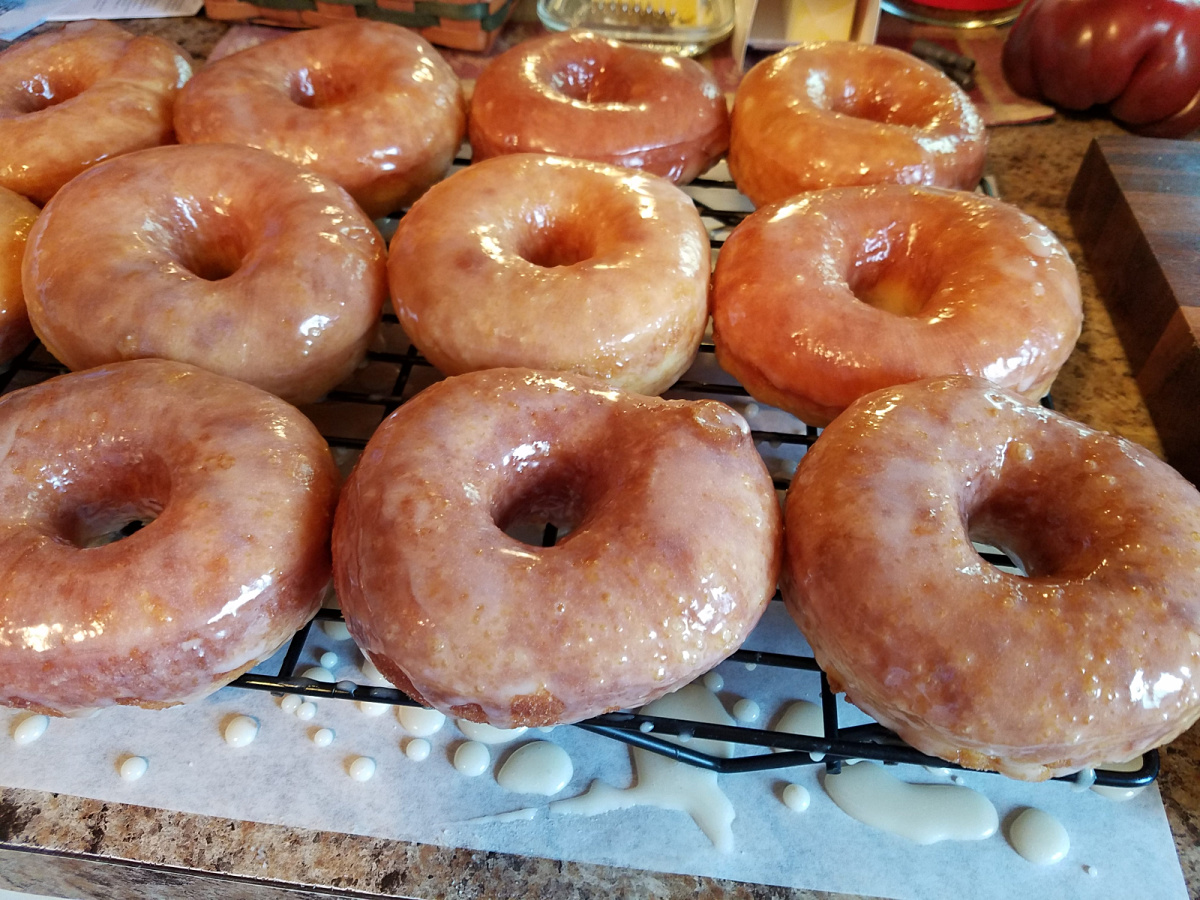
    Homemade Glazed Donuts are a light and fluffy yeast doughnut. These delicious glazed donuts are dipped in a simple donut glaze and so much better than any store-bought donuts.

    This glazed donuts recipe taste just like Krispy Kreme donuts!

    homemade glazed doughnuts on baking rack drying.

    Who doesn’t love things homemade? I know I surely do. And anything cooked or made in a cast iron skillet is sure to be even better. And Homemade Glazed Donuts are no exception!

    Why this recipe works

    • Uses simple ingredients that are readily available at most grocery stores.
    • Made from scratch using real and natural ingredients, no added preservatives or coloring.
    • Homemade donuts can be prepped ahead of time and refrigerated overnight.

    What you’ll need

    • All-purpose flour – Be sure and measure correctly. Too much flour will cause the donuts will be dense.
    • Granulated Sugar – Adds a touch of sweetness to this dough.
    • Active dry yeast – Makes this yeast dough rise properly. Be sure not to kill the yeast in too hot of water or milk.
    • Salt – Always added to baked goods to bring out the flavors.
    • Milk – While we prefer to use whole milk, you can also use 2%.
    • Eggs – Be sure they are at room temperature for best results. Always crack into a separate bowl or glass measuring cup.
    • Butter – Use unsalted so you can control the amount of salt in the dough.
    • Homemade jelly donuts in a metal loaf pan
      EASY Jelly Donuts
    • donuts lined up against each other in a wooden box
      Old-Fashioned Donuts
    • Apple donuts coated in cinnamon sugar.
      Apple Cider Donuts
    • pumpkin donuts stacked on each other on wooden cutting board lined with white parchment paper, bite out of one donut
      Pumpkin Donuts

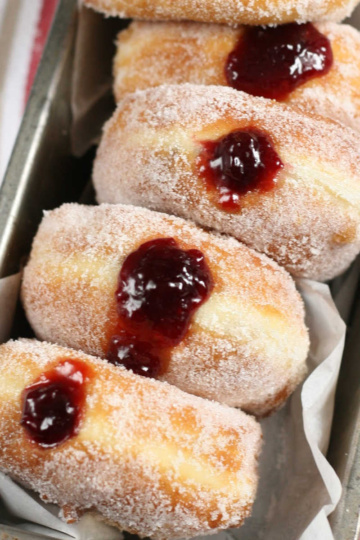
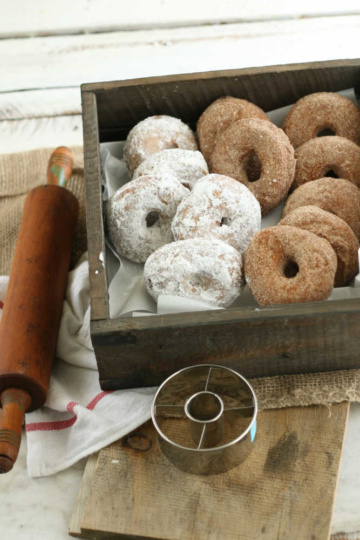
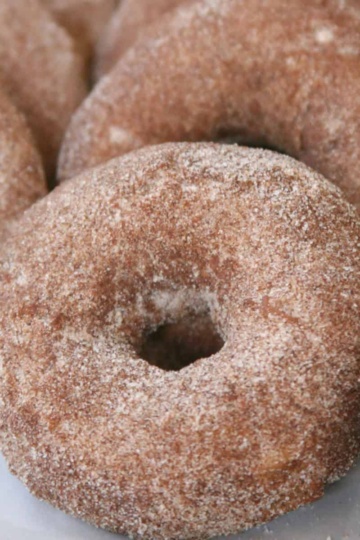
    I have fond memories of my mom making homemade donuts when we were young. They are fairly easy to make and you can even have the kids help! She often made Old-Fashioned Donuts (or what they sometimes call a cake doughnut.) Be sure and try my Jelly Donuts.

    You’ll need a doughnut cutter for this glazed donut recipe. Save yourself time and aggravation and order it on Amazon!

    glazed donut dough rising in a metal mixing bowl.

    How to make Donuts

    Step 1: Scald the milk and let cool to 115 degrees F.

    Step 2: Proof the yeast and make the dough. Dissolve the yeast in lukewarm water, add the sugar, warm milk and eggs. Incorporate the salt and flour. Cut the butter into small pieces and incorporate into the dough.

    Step 3: Knead the dough on a lightly floured work surface.

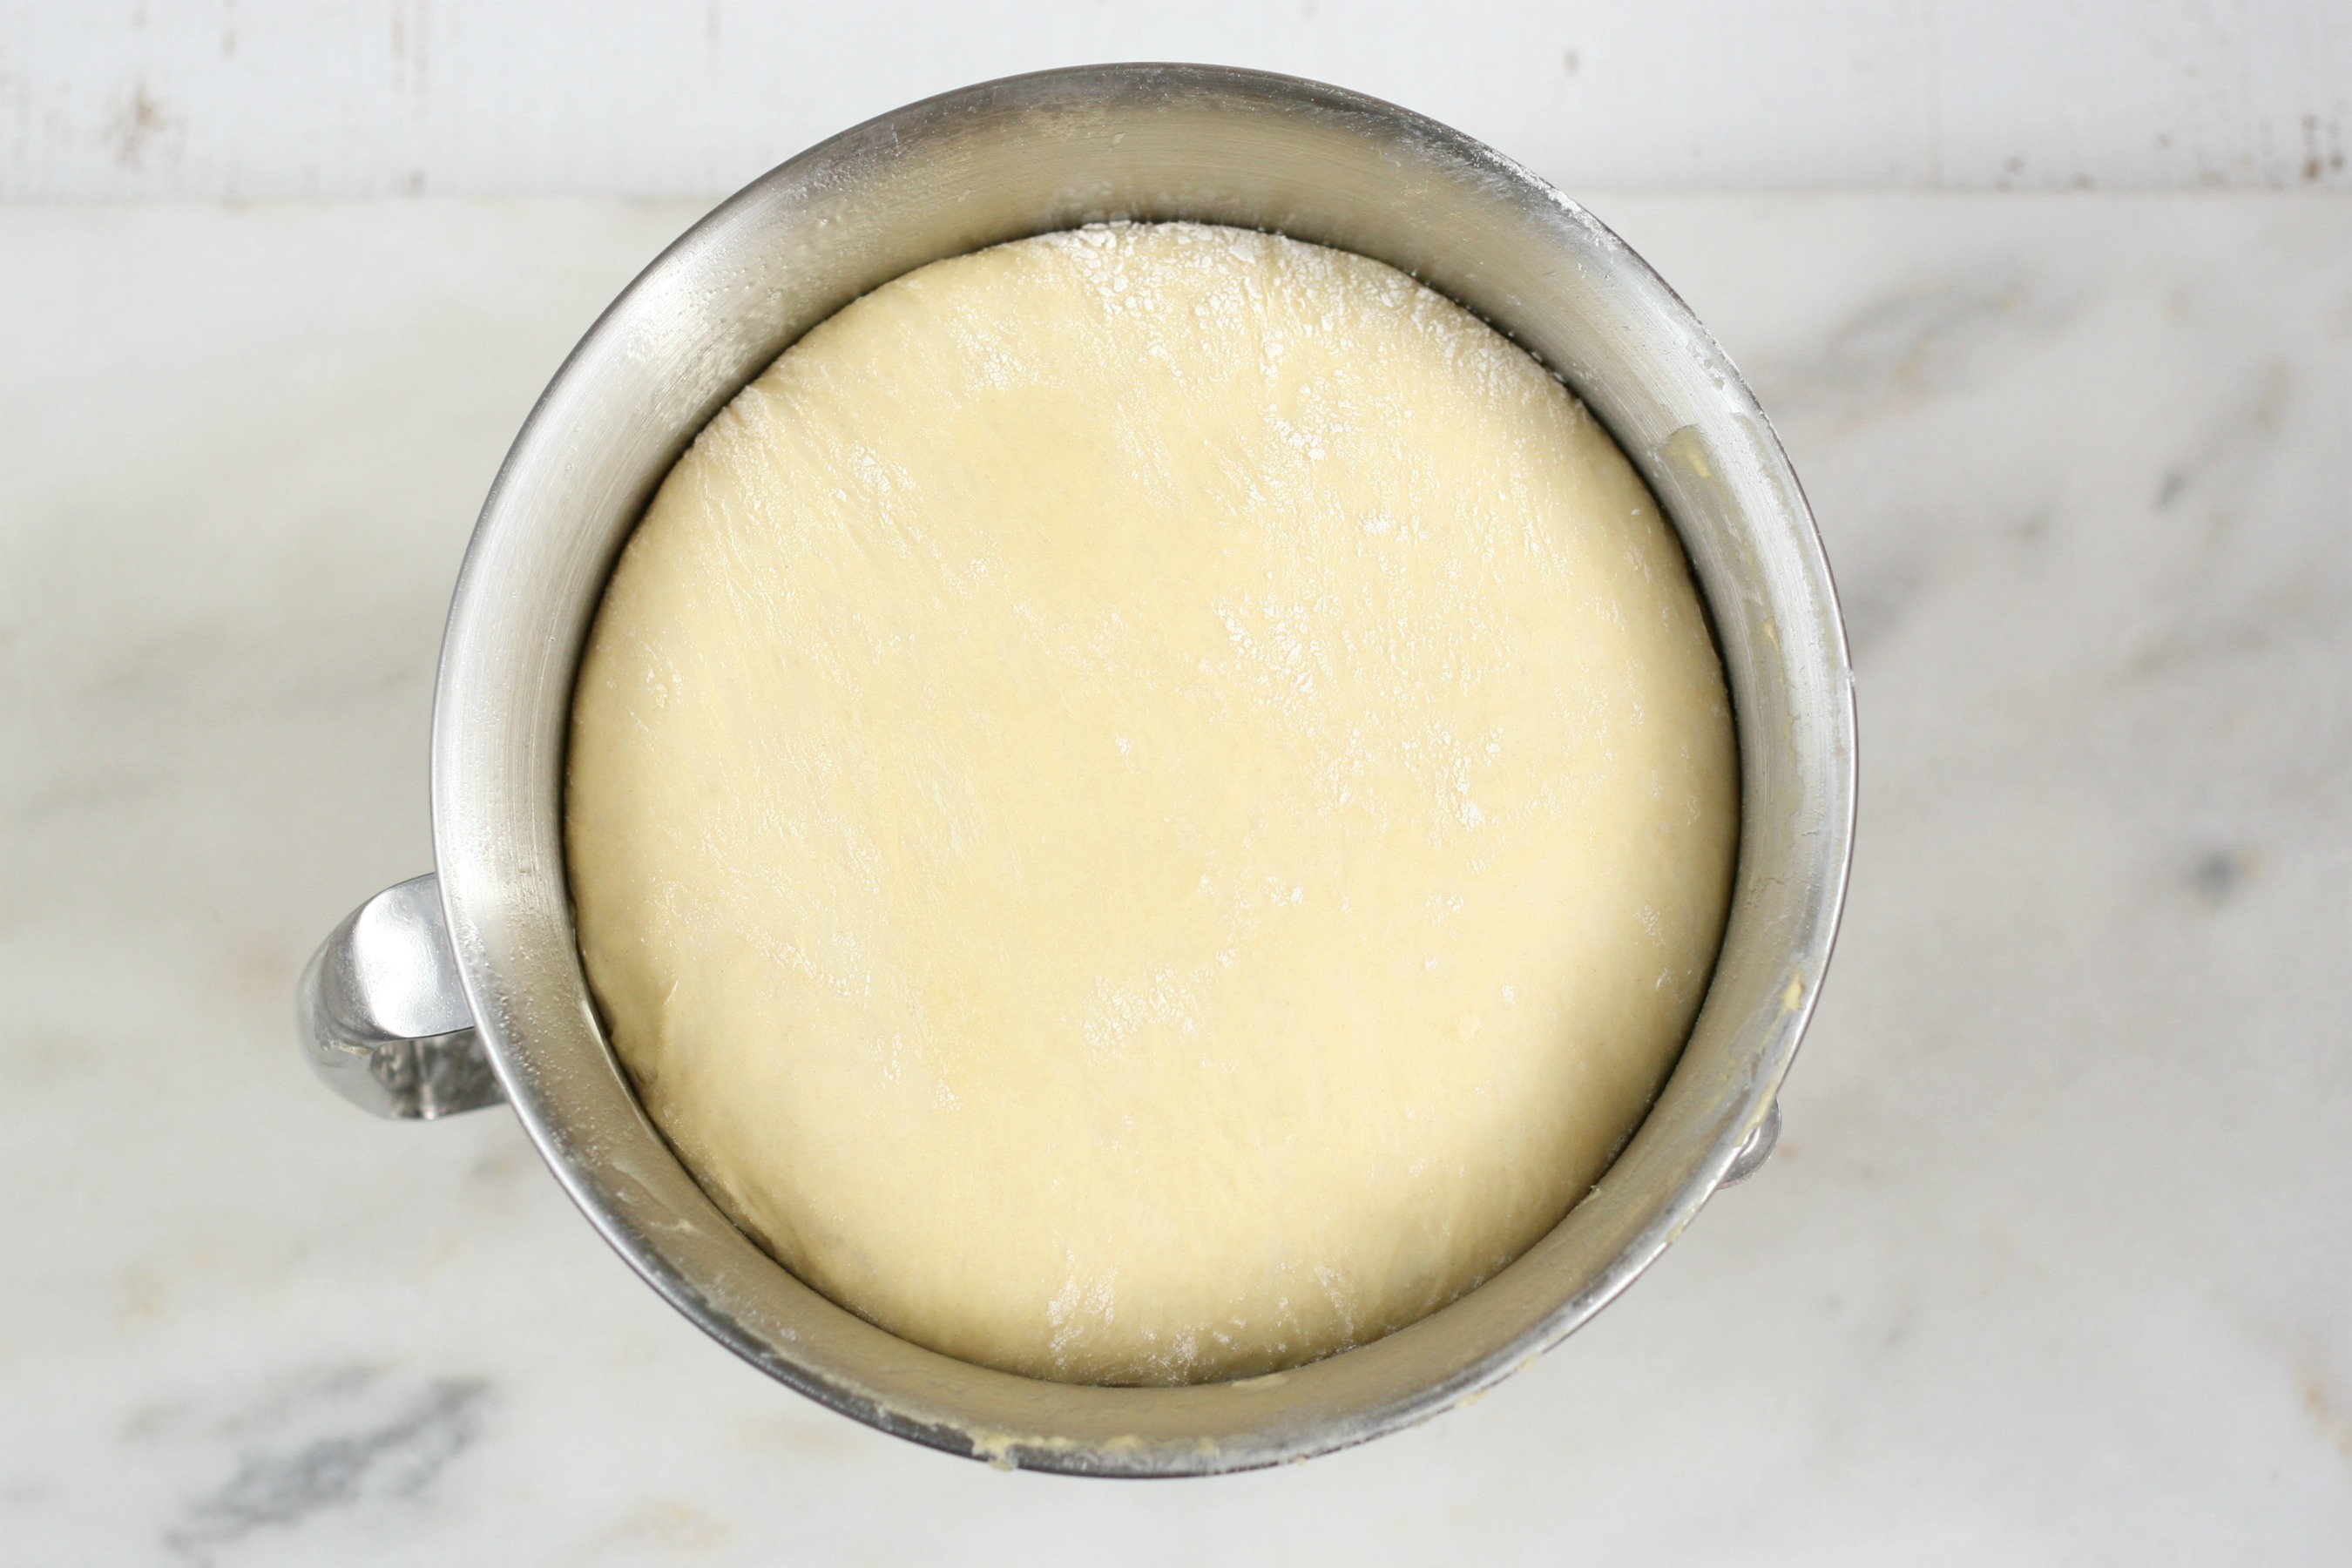
    Step 4: Proof the dough. Cover the mixing bowl and let rise in a warm area until doubled. About 1 hour.

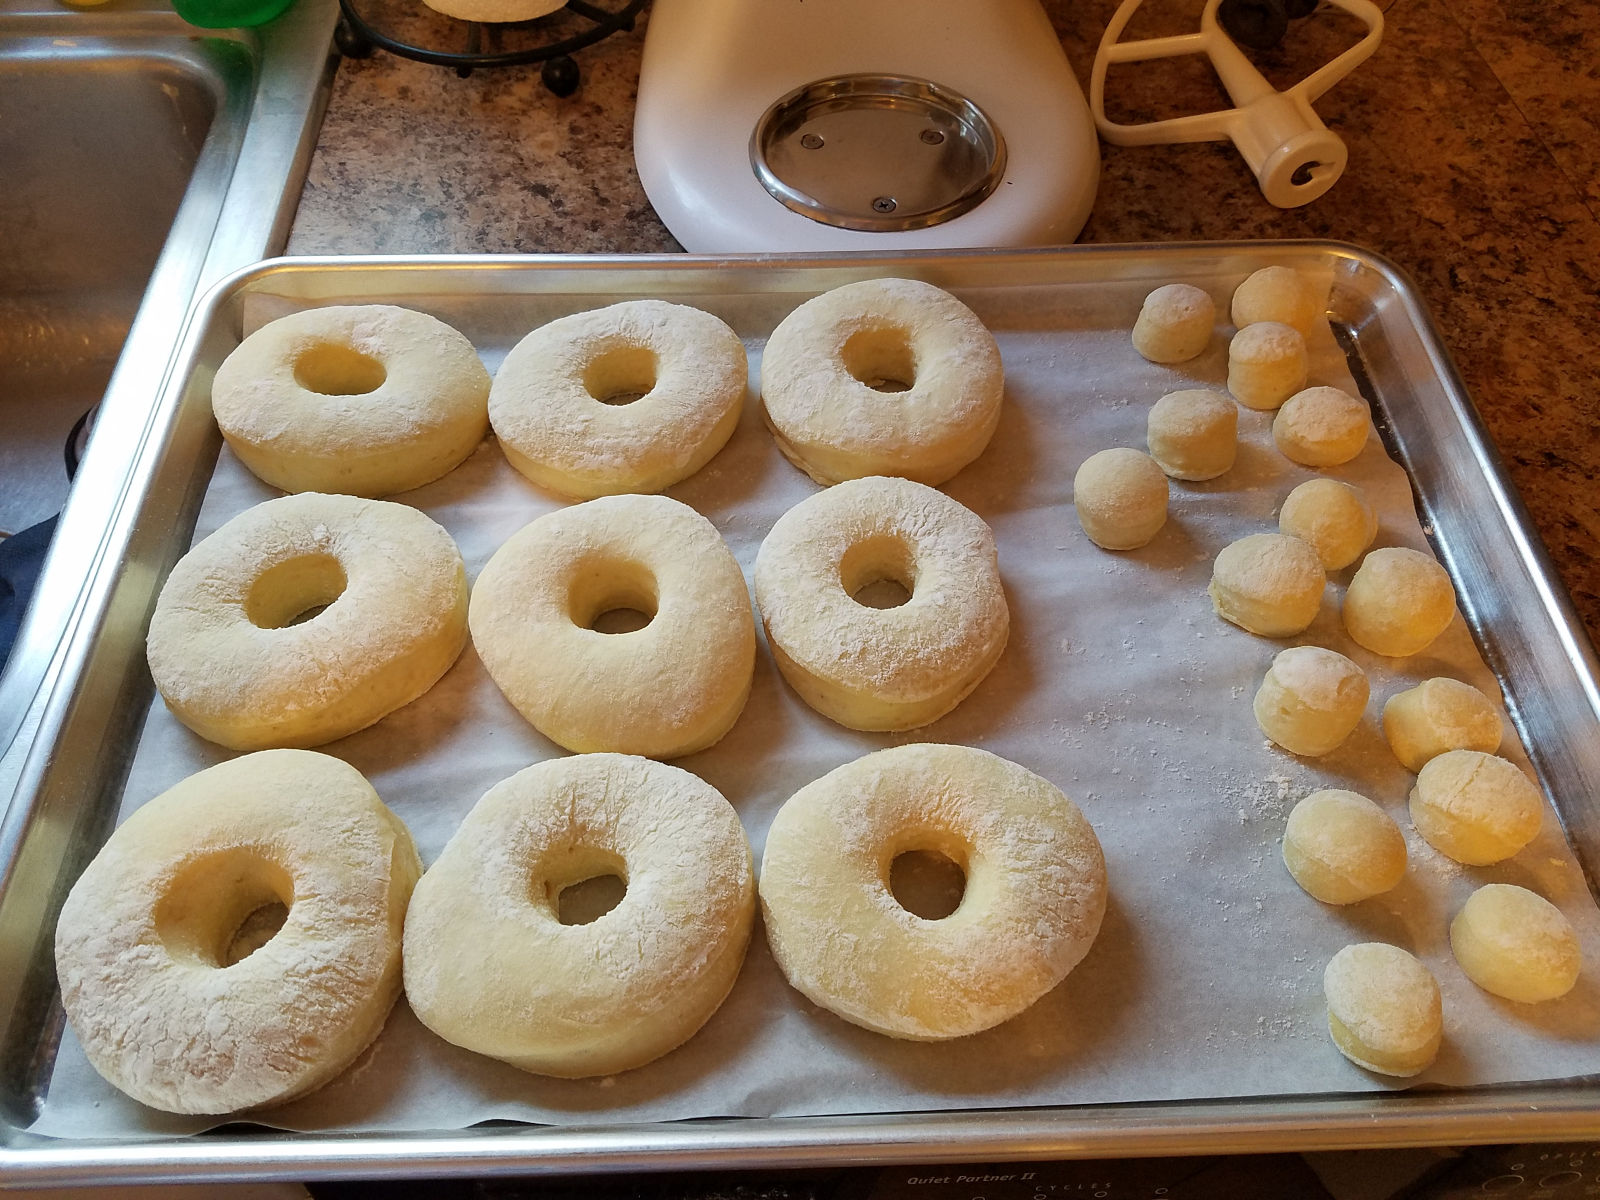
    Step 5: Roll out the donut dough to about ½-3/4-inch thickness on a lightly floured surface. Then cut out doughnuts and holes with a 3 ½-inch doughnut cutter.

    Step 6: Place the donuts and holes onto a half sheet pan lined with parchment paper. You’ll want to give them a little room to rise on the sheet pan. (I generally put 3 doughnuts in each row and you’ll fit about a dozen on each half sheet pan)

    glazed doughnuts rising on a baking pan.

    Step 7: Let the donuts rise. Cover loosely with plastic wrap and plop in the refrigerator overnight.
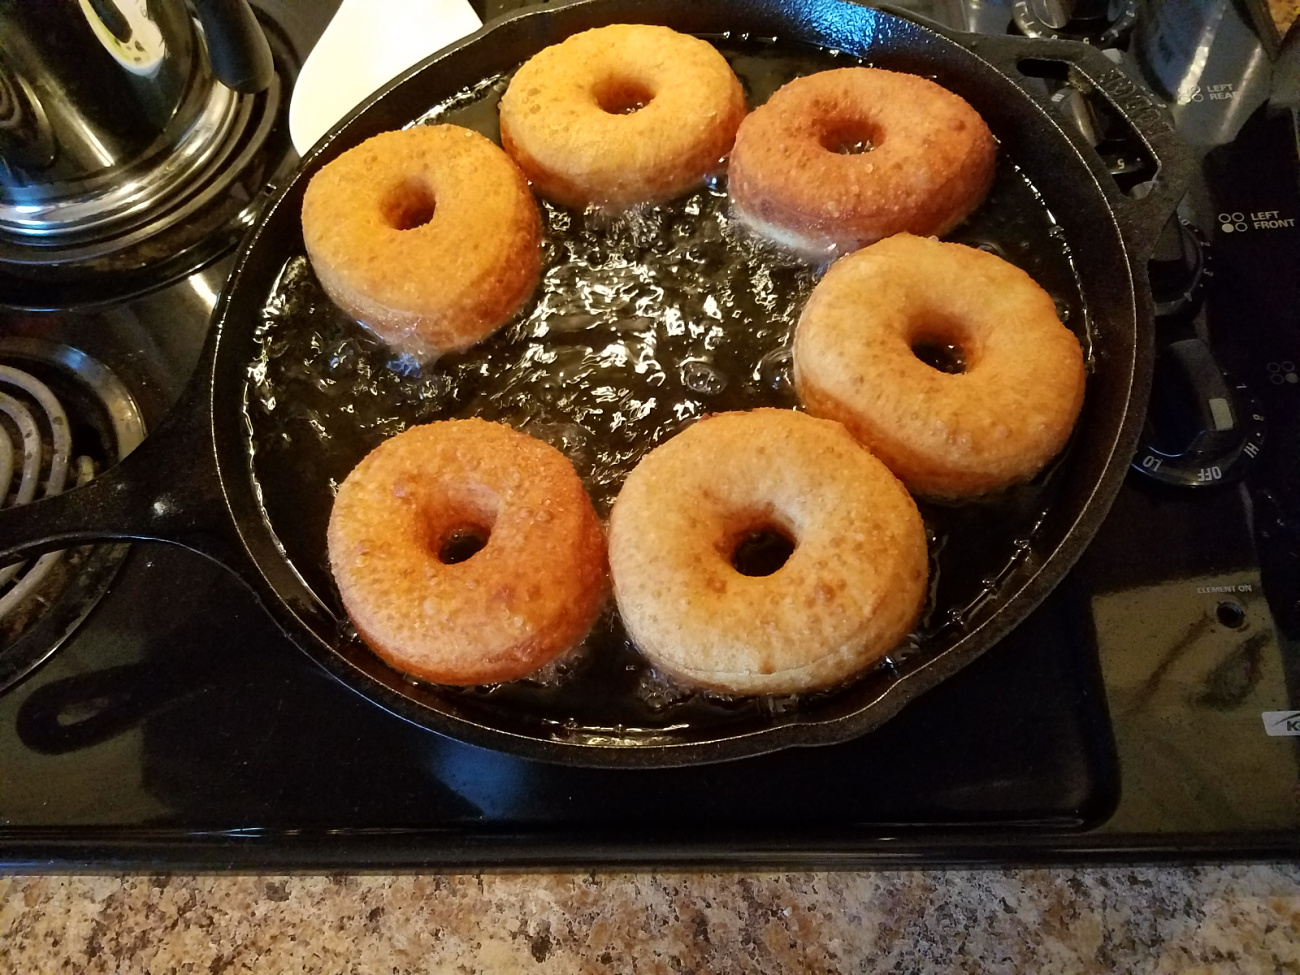
    I’m frying these babies up in a Lodge 13.25-inch cast iron skillet. Heat the oil to 375 degrees F and maintain that. Use a digital thermometer to monitor your temperature.

    To properly test the temperature of the oil, I use a ThermoWorks thermometer with a probe.

    ThermoWorks Chef alarm thermometer with probe in blue and different colors.

    Canola oil is my personal preference, because it doesn’t add any flavor to your doughnuts. Fry them on each side about 1 minute or so, flipping only once. Use a slotted spoon to lift them out of the hot oil and let drip dry on a half sheet pan lined with paper towels.

    How to make Glazed Donut glaze

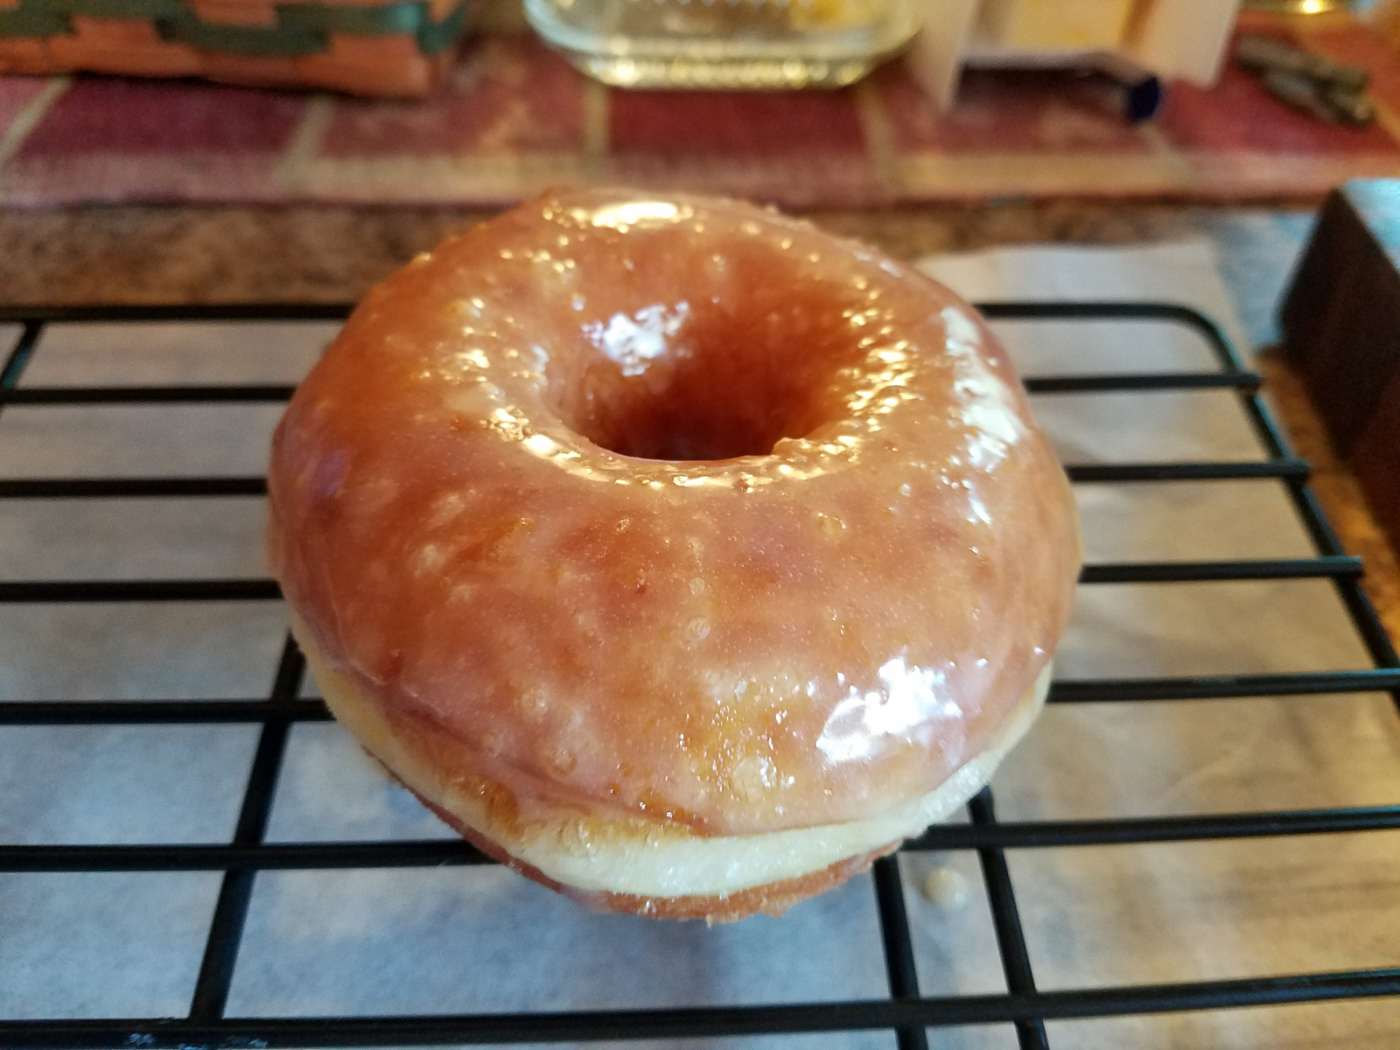
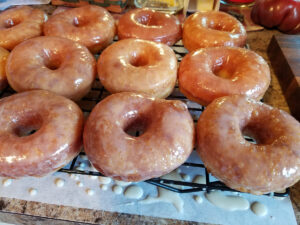
    Whisk together 2 cups powdered sugar, 4-5 tablespoons whole milk and ½ teaspoon pure vanilla extract. You’ll want your glaze to be fairly thin, so it just coats the doughnuts and drips off. You can add more milk if you need to make it thinner. Glazing doughnuts is simple, just dip the top side and let them air dry on a baking rack set over parchment paper.

    homemade doughnuts being fried up in a cast iron skillet.

    Recipe FAQs

    What is the best oil to fry donuts?

    Canola oil is the best oil to deep fry donuts, apple fritters and hand pies. It has very little flavor and will not give your donuts any off flavor. Vegetable oil or shortening will also work.

    How do you get donut glaze to harden?

    Dip the top half of your donuts into the glaze, carefully shake off any excess and place the donuts unglazed side down on a metal baking rack to dry. Place a piece of parchment paper under the rack to catch any drippings.

    What kind of flour is best for donuts?

    Bread or pastry flour is great for yeast or raised donuts. All-purpose flour is best for cake donuts, as they tend to become a little tough when using bread flour. We prefer a mix of all-purpose and bread flour when making yeast donuts. But all-purpose will work just fine.

    For more great breakfast and brunch recipes be sure and try Homemade Apple Pie, Apple Hand Pies, Blackberry Pie Recipe, Apple Fritter Recipe, and Sour Cream Coffee Cake.

    glazed donut drying on a baking rack.

    More Donuts Recipes

    • Apple Cider Donuts
    • Blueberry Cake Donuts
    • Jelly Donuts
    • Pumpkin Donuts
    • Red Velvet Donuts

    Making Homemade Glazed Donuts

    The dough is quite sticky- don’t add more flour because otherwise you might make them tough. You want the dough to be light and airy. Hence why you let the dough rise twice, even before you cut into doughnuts. Yes, this recipe takes some time. But, make them the day before- I usually make them in the afternoon/evening. Refrigerate overnight, then fry them fresh in the morning.

    homemade glazed doughnuts on baking rack drying.

    Did you make one of my recipes? Please take a moment to leave a star rating. Also, if you are on Pinterest, please feel free to leave a comment there! Follow A Farmgirl’s Kitchen on FACEBOOK, PINTEREST and YouTube and subscribe my mailing list for ALL the latest recipes!

    5 from 11 votes
    homemade glazed doughnuts on baking rack drying
    Print Rate this Recipe

    Glazed Donuts

    Prep Time2 hrs
    Cook Time2 mins
    Total Time2 hrs 2 mins
    Glazed Donuts are made with a light and fluffy donut dough.
    Course: Breakfast or Brunch, Dessert
    Cuisine: American, Southern
    Servings: 18 doughnuts
    Calories: 436kcal
    Author: Jessica Robinson

    Ingredients

    Donuts Dough

    • 1 .25-ounce packet (2 ¼ teaspoons) active dry yeast
    • ¼ cup lukewarm water
    • 1 ½ cups whole milk, scaled and cooled down
    • ¼ cup granulated sugar
    • 2 tablespoons granulated sugar (or honey)
    • 3 large eggs (room temperature)
    • 5 to 5 ½ cups all-purpose flour
    • 1 teaspoon salt
    • ½ cup (1 stick) unsalted butter softened

    Donut Icing

    • 3 cups powdered sugar
    • 1 teaspoon pure vanilla extract
    • 3-5 tablespoons whole milk

    Instructions

    Donut Dough

    • In a large mixing bowl of a stand mixer dissolve the yeast in the warm water. Add the warm milk, sugar and eggs. Add the dough hook attachment, and stir in the flour and salt. Scrape the bottom and sides of the bowl occasionally with a rubber spatula.
    • Cut the butter into small pieces and incorporate into the dough. Scrape the bowl a few times. Beat the dough until it becomes smooth, about 5-7 minutes.
    • Turn the dough out onto a floured work surface and knead for 5-6 minutes, making a smooth dough. This dough is going to be sticky when you turn it out.
    • After kneading, shape into a round ball and place back into the greased mixing bowl. Cover loosely with plastic wrap and drape with a clean kitchen towel. Place in a warm area and let rise until doubled in size, about 1 to 1 ½ hours.
    • Turn the dough out onto a lightly floured work surface and knead the dough for a few minutes. Turn back into the greased bowl (spray with cooking spray again if needed) and let rise until doubled, about 1 hour.
    • Whisk together your icing. Cover with plastic wrap and set aside. You want it to be fairly thin.
    • Line a baking sheet with parchment paper and set aside.
    • Turn the dough out onto a lightly floured surface, and use a rolling pin to roll out the dough to about ½-inch thickness. Lightly flour a donut cutter and use it to cut out the donuts, then place them onto the prepared baking sheet. Let the doughnuts rise for 1 hour or until doubled in size.*
    • Line a baking sheet with several layers of paper towels and set aside. In a large heavy-duty pot, add about 3-inches of canola oil. Heat to a temperature of 375 degrees F. Drop about 4 donuts into the oil, making sure not to overcrowd the pot. Cook for 1 to 2 minutes on each side, or until lightly golden brown. Remove the donuts from the oil and allow to drain on the paper towels.
    • Let cool slightly before dipping only the tops in the icing. Let drip dry on a cooling rack, placed on a parchment lined half sheet pan. Once the icing is set, enjoy!

    Recipe Notes

    Scald the milk in a glass measuring cup or microwavable container in the microwave or in a saucepan on the stovetop. Microwave in increments and stir occasionally to prevent it from burning or boiling over. Bring the scaled milk down to lukewarm, around 115 degrees F.

    Adding flour to donut dough

    I usually start with 5 cups flour and knead in the remaining flour on the counter. This is a very sticky dough and you want it to be smooth, but not become rough or overworked. If you add too much flour, the donuts will become dense.

    PREP AHEAD TIP:

    You can let the donuts proof in the fridge overnight. After you cut the donuts with a donut cutter, place them on a half sheet pan lined with parchment paper. Cover the half sheet pan loosely with plastic wrap and let them proof in the fridge overnight. Then fry up fresh in the morning!

    Nutrition

    Calories: 436kcal | Carbohydrates: 82g | Protein: 10g | Fat: 7g | Saturated Fat: 4g | Cholesterol: 43mg | Sodium: 197mg | Potassium: 133mg | Fiber: 2g | Sugar: 26g | Vitamin A: 235IU | Calcium: 42mg | Iron: 3.6mg
    Tried this Recipe? Pin it for Later!Mention @AFarmgirlsKitchen or tag #afarmgirlskitchen!

    Disclosure: As an Affiliate Marketer, I earn from qualifying purchases. If you click a product affiliate link on A Farmgirl’s Kitchen and make a purchase, I may receive a commission at no additional cost to you!  I own every cooking product I recommend and love how they perform.

    « Blueberry Peach Puff Pastry
    Red Velvet Cake Donuts »

    Reader Interactions

    Comments

    1. RG says

      January 15, 2023 at 11:09 pm

      5 stars
      I made these for my family. I was a little intimidated by the recipe but everything turned out perfect from the dough to the glaze. I still can’t believe I made homemade donuts! My family kept saying how mouth watering they were. Needless to say it was a hit! So glad I found this recipe. Thanks for sharing.

      Reply
      • Jessica Robinson says

        January 16, 2023 at 10:25 am

        Thank you so much for visiting!! Thrilled to hear you enjoyed the donuts!

        Reply
    2. M G says

      October 28, 2022 at 5:55 pm

      How many cups of all purpose and bread flour to make these doughnuts?

      Reply
      • Jessica Robinson says

        October 29, 2022 at 7:22 pm

        The cups of flour is listed in the recipe card. We like to add the lesser amount to start and knead the rest on the counter. If using a mix of all-purpose flour and bread flour, we would recommend using more all-purpose flour and mixing in a little of bread flour. Though we usually use only all-purpose flour only.

        Reply
    3. Carmen says

      September 25, 2022 at 2:08 pm

      Wanting to try these but a little confused about timing. Your recipe states 3+ hours of rising but at the top it says total time is only 2+ hours. Is it 2 rises or 3? And an overnight rise would be way longer than that… Just curious! Thank you.

      Reply
      • Jessica Robinson says

        September 27, 2022 at 12:45 pm

        Carmen,
        Unless you are using instant yeast, you’ll want the dough to rise twice as a round. Then roll out and cut into donuts, then let them double in size. Rising time really depends on how warm the area is and the freshness of ingredients (yeast, etc)

        Reply
    4. Angel says

      August 12, 2022 at 12:05 am

      And tips on how to store leftovers?

      Reply
      • Jessica Robinson says

        August 28, 2022 at 11:56 am

        They are best enjoyed right away.

        Reply
    5. Sue says

      April 02, 2022 at 12:13 am

      5 stars
      Can these be baked instead of fried? If so, 350 degrees for 12 minutes or so until a toothpick comes out clean? Thanks!

      Reply
      • Jessica Robinson says

        April 02, 2022 at 7:24 pm

        These are a Yeast donut and can only be fried. They are NOT meant to be baked.

        Reply
    6. Jackie says

      December 25, 2021 at 12:00 pm

      I made them for Christmas breakfast. I kept my thermometer in the oil so they don’t over cook. I did keep them in the frig. over night and let them rise early in the morning. Didn’t rise as good. They sure are tasty! Powdered, glaze and jelly filled. Yum yum!

      Reply
      • Jessica Robinson says

        December 25, 2021 at 12:44 pm

        Hello Jackie,
        What I would usually suggest is have them rise partially on the counter before placing the sheet pan into the fridge. You can also check and see if your yeast is still fresh. Or it’s possible to kill yeast if your water or milk is too hot. There are lots of things that can potentially go wrong. We usually keep yeast in an airtight glass container in the fridge to keep it super fresh. Glad to hear you still enjoyed them!

        Reply
    7. Gail says

      October 07, 2021 at 9:23 pm

      I just made this recipe yesterday and it’s amazing! My family say they are better than one of our local bakery’s donuts that we all love. This was my first time making donuts on my own and the recipe was easy to follow.

      Reply
      • Jessica Robinson says

        October 07, 2021 at 9:31 pm

        So happy to hear you had success your first time making them and enjoyed them so much!

        Reply
    8. Judy says

      September 02, 2021 at 12:10 am

      I haven’t made these yet. 5 to 7 minutes of needing… can’t this be done in your stand mixer with your dough hook?

      Reply
      • Jessica Robinson says

        September 02, 2021 at 9:39 am

        Judy,
        Thanks for stopping by. This is brioche dough. It’s preferred to hand knead it, otherwise your dough can potentially become overworked and tough.

        Reply
    9. Alexis says

      March 16, 2021 at 5:09 pm

      Hi,
      Quick question I wanted to know how would I go about using instant yeast?

      Reply
      • Jessica Robinson says

        March 16, 2021 at 8:24 pm

        Hello Alexis,
        You would skip the second rise and go right into rolling out the dough and cutting donuts if using instant yeast.

        Reply
    10. Rosie says

      March 01, 2021 at 2:40 pm

      5 stars
      Hello! Thank you so much for sharing this recipe I’ve made it a few times now and it’s a big hit with my neighbours who I’ve been treating with goodies during this pandemic 😆
      Just wondering do you know if it’s possible to freeze the shaped uncooked doughnuts? Thaw and then fry at a later date or maybe cook and freeze them before icing, just I’d like to be able to have them “on demand” haha! Thank you again! Xx

      Reply
      • Jessica Robinson says

        March 01, 2021 at 3:20 pm

        Rosie,
        Oh thank you so much!! Glad to hear you are enjoying this recipe. I don’t see why you couldn’t freeze them uncooked. We freeze cinnamon rolls with a similar dough and they come out great.

        Reply
    11. Rollie says

      December 12, 2020 at 10:31 pm

      5 stars
      Awesome, and a lot of fun to make…thx.

      Reply
      • Jessica Robinson says

        December 13, 2020 at 1:53 pm

        Happy to hear you enjoyed it.

        Reply
    12. Kristin says

      May 29, 2020 at 10:23 pm

      5 stars
      I made these today! They were easy & turned out amazing! The glaze is perfect! Will definitely make again!

      Reply
      • Jessica Robinson says

        May 29, 2020 at 10:40 pm

        Kristin,
        So happy to hear that you loved them! Glad they came out great! Thanks for letting me know!

        Reply
    13. Gina says

      April 30, 2020 at 7:38 pm

      I sont know if I’ll get my answer in time…I plan on making these tomorrow night, to fry up saturday morning. My question is, can I leave the cut doughnuts out on the countertop instead of the fridge for the last rise? (not sure I’ll have the fridge space to put them in there overnight) would they spoil if I left them out on the counter, or rise too much and ruin them? Anyway, just wondering. Thank you!

      Reply
      • Jessica Robinson says

        April 30, 2020 at 7:41 pm

        Hi Gina,
        Of course! You can let them do their final rise on the counter, vs. the fridge… But that won’t take too long. (See my notes in the directions) They WILL spoil (and over proof) if you leave them out on the counter overnight. Let me know if you have more questions!

        Reply
    14. Lorraine says

      April 21, 2020 at 9:49 pm

      Hi I’m uncertain about this step, do you put the shaped donuts and holes in the fridge overnight or before they are shaped?
      Thank you

      Reply
      • Jessica Robinson says

        April 21, 2020 at 9:52 pm

        Hi Lorraine,
        You cut the doughnuts & holes and place on a parchment lined half sheet pan… possibly two pans, so they are spaced out with a little room so they can rise and not stick to each other. Cover the entire tray loosely with plastic wrap and plop in the fridge overnight. Fry up fresh in the morning. Let me know if you have other questions!

        Reply
    15. Hannah says

      April 12, 2020 at 6:37 pm

      5 stars
      Perfect recipe. The doughnut was light and airy. Such a yummy flavor too.. My husband loved them and kept going on about how good they were. I didn’t have any canola oil so I fried in a mix of coconut oil and butter. Next time I may try the canola. It did take a very long time with all the proving but was totally worth it.

      Reply
      • Jessica Robinson says

        April 13, 2020 at 11:49 am

        Hi Hannah!!
        Thanks for telling us about the doughnuts! Yes, love to fry in canola oil because it doesn’t flavor the doughnuts. All you taste is delicious, light and fluffy doughnuts!

        Reply
    « Older Comments

    Leave a Reply Cancel reply

    Your email address will not be published. Required fields are marked *

    Recipe Rating


    Yes, I would like to receive emails from A Farmgirl's Kitchen. Sign me up!


    By submitting this form, you are consenting to receive marketing emails from: A Farmgirl's Kitchen, Dixon Road, Graham , NC, 27253. You can revoke your consent to receive emails at any time by using the SafeUnsubscribe® link, found at the bottom of every email. Emails are serviced by Constant Contact

    Primary Sidebar

    Meet Jessica

    Hi I’m Jessica!

    Meals are meant to be shared around the dinner table. My recipes are farm-inspired with a modern twist for active families. All of my recipes use simple and readily available ingredients. Read more →

    • Facebook
    • Instagram
    • Pinterest

    Cast Iron Cooking and Baking

    Caramel Apple Pie

    apple fritters on baking rack with glaze drying.

    Homemade Apple Fritters

    Red Dutch oven with Boeuf Bourguignon

    Classic Boeuf Bourguignon

    Chicken fajitas with onions and peppers being hand held

    Cast Iron Chicken Fajitas

    Blackberry hand pies on wooden cutting board, loose blackberries around.

    Blackberry Hand Pies

    Apple donuts coated in cinnamon sugar.

    Apple Cider Donuts

    Home Canning

    Dill pickle spears in clear glass jar with clasp lid and rubber orange seal on small wooden cutting board.

    Dill Pickles Recipe

    Jar of raspberry peach jam on wooden cutting board, floral spoon in jar.

    Raspberry Peach Jam

    Mason jars of marinara sauce on wooden cutting board, tomato quarters, fresh herbs, whole garlic cloves.

    Marinara Sauce Recipe

    Vintage Mason jars filled with multi color pickled sweet peppers.

    Pickled Peppers

    raspberry rhubarb jam on spoon on top of glass jar with loose berries and rhubarb on wooden cutting board

    Raspberry Rhubarb Jam

    Homemade Pie Recipes

    Cobbler with lattice pie crust in white baking dish, apples around.

    Apple Cobbler

    Cherry cobbler with lattice crust, fresh cherries around, wooden spoon.

    Cherry Cobbler

    Cherry pie with crumb topping in dual handle white pie pan.

    Cherry Crumb Pie

    Peach crumb pie with peaches in background.

    Peach Crumb Pie

    Blueberry cobbler with lattice pie crust, fresh blueberries around.

    Blueberry Cobbler

    Crumb apple pie on wooden cutting board, red and green apples around.

    Apple Crumb Pie

    Chili & Soups

    Red Dutch oven with Boeuf Bourguignon

    Classic Boeuf Bourguignon

    bowl of Italian sausage soup, topped with shredded yellow cheddar cheese and slices of French baguette to side of bowl

    Sausage and Vegetable Soup

    pulled pork on a soft roll topped with coleslaw

    Slow Cooker Pulled Pork

    The Best Mac and Cheese Recipe is super creamy and topped with Applewood Bacon Pulled Pork. This dish uses two different kinds of cheeses in a homemade cheese sauce for the ultimate comfort food! #bestmacandcheese #recipes #recipe #kidfriendly #macandcheese #macaroni

    Homemade Mac and Cheese

    loaded baked potato soup with crumbled bacon pieces, shredded cheddar cheese, sour cream, and thin slices of green onions in a white glass bowl with large spoon to the right of the bowl

    Homemade Potato Soup

    Beef stew with carrots, potatoes, celery in small white bowl, spoon on right.

    Braised Brisket Stew

    Footer

    ↑ back to top

    About

    • About
    • Contact

    Follow Us On

    • Facebook
    • Twitter
    • Instagram
    • Pinterest

    Policies

    • Privacy Policy
    • Accessibility Statement

    Copyright 2022 - A Farmgirl's Kitchen ®